How to connect to JDBC database in Java?
How to connect to JDBC database in Java?
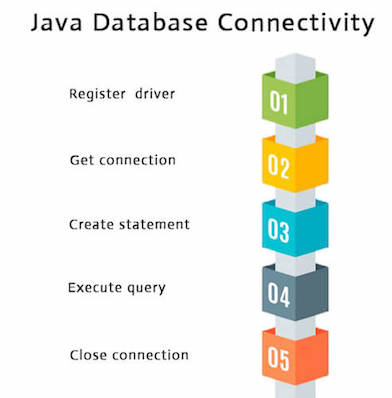
I'm happy to help you with that! Here's a comprehensive guide on how to connect to a JDBC database in Java:
Step 1: Add the necessary libraries
To start, you'll need to add the JDBC library to your project. The most commonly used one is mysql-connector-java. You can download it from the official MySQL website or use Maven to manage dependencies.
In Maven-based projects, you would add the following dependency in your pom.xml file:
mysql
mysql-connector-java
8.0.21
For non-Maven projects, download the JAR file and add it to your project's classpath.
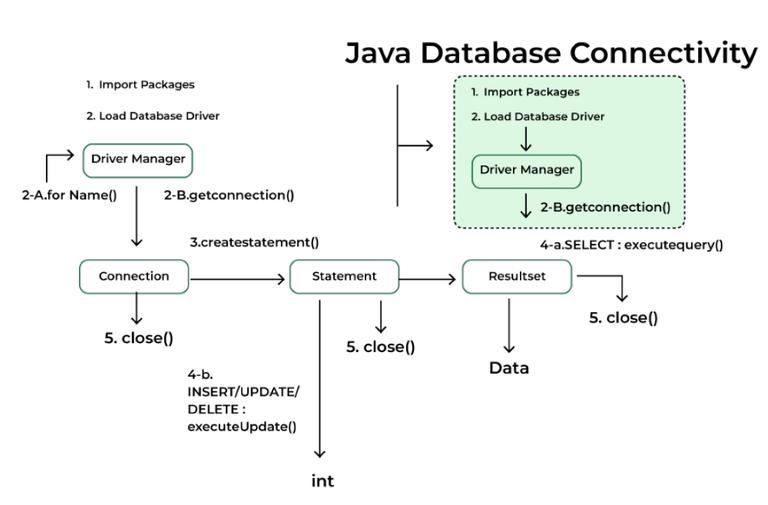
Step 2: Load the JDBC driver
In your Java program, load the JDBC driver by calling Class.forName():
try {
Class.forName("com.mysql.cj.jdbc.Driver");
} catch (ClassNotFoundException e) {
System.out.println("Error loading driver: " + e.getMessage());
return;
}
Replace "com.mysql.cj.jdbc.Driver" with the actual class name of your JDBC driver.
Step 3: Create a connection
Create a Connection object to establish a connection to your database:
String url = "jdbc:mysql://localhost:3306/mydatabase";
String user = "your_username";
String password = "your_password";
try {
Connection conn = DriverManager.getConnection(url, user, password);
} catch (SQLException e) {
System.out.println("Error connecting to the database: " + e.getMessage());
return;
}
Replace "jdbc:mysql://localhost:3306/mydatabase" with your actual database URL. This URL should be in the format jdbc:<driver_name>://<host>:<port>/<database_name>.
Step 4: Execute a query
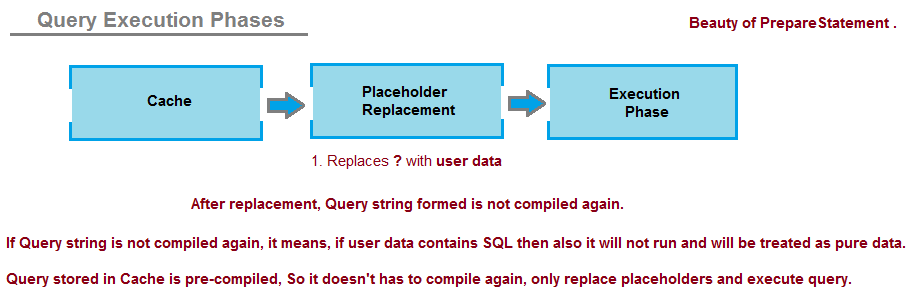
Once you have a connection, you can execute queries using a Statement or a PreparedStatement. Here's an example of executing a SELECT query:
String query = "SELECT * FROM mytable";
try {
Statement stmt = conn.createStatement();
ResultSet result = stmt.executeQuery(query);
while (result.next()) {
System.out.println(result.getString("column_name"));
}
} catch (SQLException e) {
System.out.println("Error executing the query: " + e.getMessage());
}
Replace "SELECT * FROM mytable" with your actual query. This example executes a SELECT query and prints out the results.
Step 5: Close the connection
Don't forget to close the connection when you're done:
try {
conn.close();
} catch (SQLException e) {
System.out.println("Error closing the connection: " + e.getMessage());
}
This is a basic example of connecting to a JDBC database in Java. You can customize it further by using prepared statements, transactions, and other features provided by the JDBC API.
Remember to handle exceptions properly and close resources when you're done to avoid resource leaks!
Jdbc connection in java with oracle example
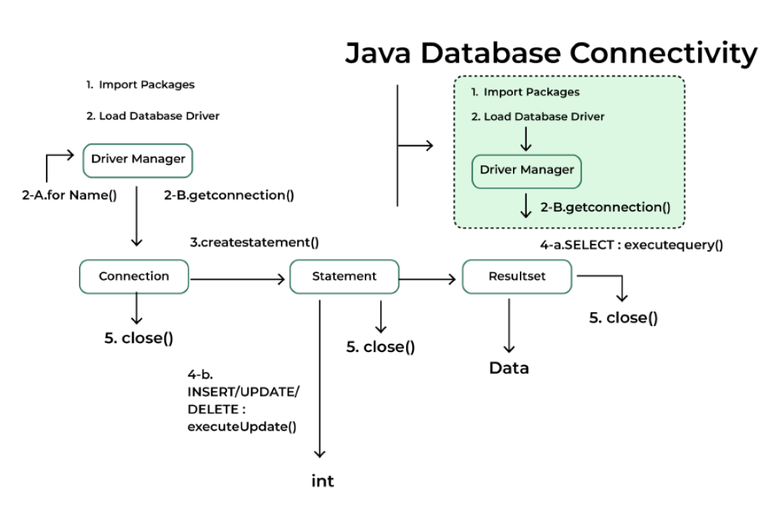
Here is an example of a JDBC (Java Database Connectivity) connection to Oracle in Java:
Step 1: Add the necessary libraries
To use JDBC, you need to add the java.sql and oracle.jdbc libraries to your Java project. You can do this by including the following lines in your pom.xml file (if you're using Maven):
com.oracle.ojdbc
ojdbc8
19.3.0.0
Step 2: Load the Oracle JDBC driver
Before you can use the Oracle JDBC driver, you need to load it into your Java program. You can do this by using the following code:
import java.sql.*;
public class Main {
public static void main(String[] args) {
// Load the Oracle JDBC driver
try {
Class.forName("oracle.jdbc.driver.OracleDriver");
} catch (ClassNotFoundException e) {
System.out.println("Oracle JDBC driver not found!");
return;
}
}
}
Step 3: Establish a connection to the database
Once you've loaded the Oracle JDBC driver, you can establish a connection to your Oracle database using the following code:
import java.sql.*;
public class Main {
public static void main(String[] args) {
// Load the Oracle JDBC driver
try {
Class.forName("oracle.jdbc.driver.OracleDriver");
} catch (ClassNotFoundException e) {
System.out.println("Oracle JDBC driver not found!");
return;
}
// Establish a connection to the database
String url = "jdbc:oracle:thin:@localhost:1521/ORCL";
String username = "your_username";
String password = "your_password";
try (
Connection conn = DriverManager.getConnection(url, username, password);
Statement stmt = conn.createStatement();
) {
// Execute a query
ResultSet resultSet = stmt.executeQuery("SELECT * FROM your_table");
while (resultSet.next()) {
System.out.println(resultSet.getString("column_name"));
}
} catch (SQLException e) {
System.out.println("SQL exception: " + e.getMessage());
}
}
}
In this example, we're using the DriverManager class to establish a connection to our Oracle database. We specify the URL of our database, the username and password we use to log in, and the type of driver we want to use (in this case, the thin driver).
Step 4: Execute queries
Once you've established a connection to your database, you can execute SQL queries using the Statement class. In this example, we're executing a simple SELECT query that retrieves all rows from a table called your_table.
We then loop over the results of our query using the while loop, and print out each row.
Step 5: Close the connection
Finally, when you're done with your database connection, you should close it to free up system resources. You can do this by calling the close() method on your Connection object:
conn.close();
This is just a basic example of how to use JDBC to connect to an Oracle database and execute SQL queries in Java. Depending on your specific needs, you may need to add additional error handling or perform other tasks.
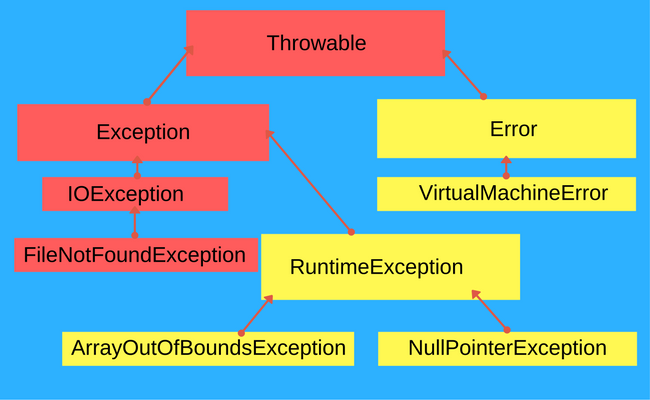
Here are some common errors that you might encounter when using JDBC:
SQLException: This exception is thrown if there's an error executing a SQL statement. ClassNotFoundException: This exception is thrown if the Oracle JDBC driver can't be found. IOException: This exception is thrown if there's an error reading or writing to the database.
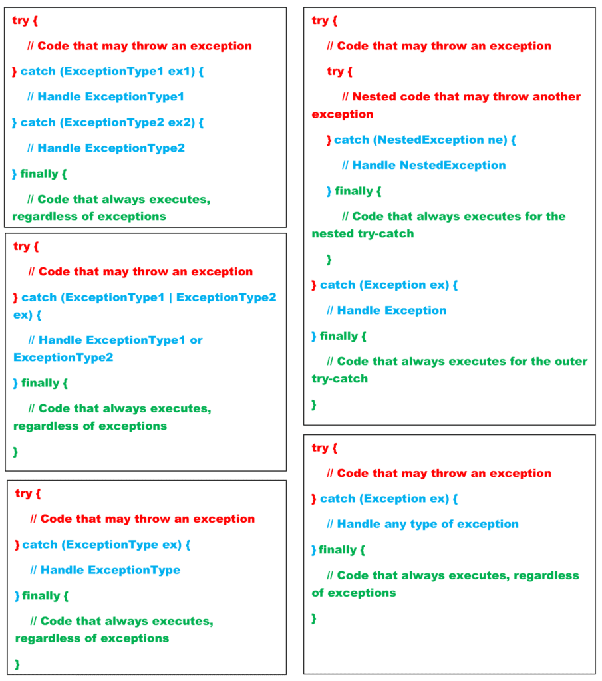
You can handle these exceptions by catching them in your code and printing out an error message. Here's an example:
try {
// Execute a query
} catch (SQLException e) {
System.out.println("SQL exception: " + e.getMessage());
} catch (ClassNotFoundException e) {
System.out.println("Oracle JDBC driver not found!");
}
I hope this helps! Let me know if you have any questions.

