Java redis download ubuntu
Java redis download ubuntu
I'd be happy to help you with that.
Java Redis Download Ubuntu
Redis is an open-source, in-memory data store that can be used as a database, message broker, or caching layer. It's known for its high performance and low latency, making it a popular choice among developers.
To download Redis on Ubuntu, follow these steps:
sudo apt-get update. Install Redis: Once the package list is updated, you can install Redis using the command sudo apt-get install redis-server.
After installing Redis, you can start the server with the command sudo service redis-server start. This will start the Redis server and make it available for your applications to connect.
Java Redis Client
To interact with Redis from Java, you'll need a Redis client library. There are several options available, including Jedis, which is a popular choice among developers.
Here's an example of how you can use Jedis to connect to a Redis instance:
import redis.clients.jedis.Jedis;
import redis.clients.jedis.JedisPoolConfig;
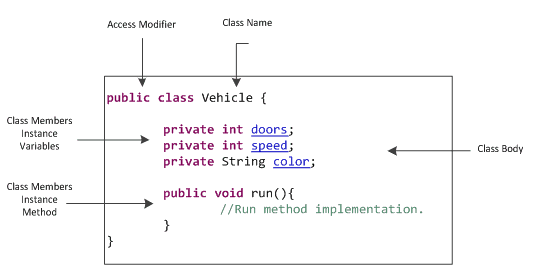
public class JavaRedisExample {
public static void main(String[] args) {
// Create a Jedis pool configuration
JedisPoolConfig config = new JedisPoolConfig();
config.setMaxActive(100);
// Create a Jedis instance using the pool configuration
Jedis jedis = new Jedis("localhost", 6379, config);
try {
// Set a value in Redis
jedis.set("key", "value");
// Get the value from Redis
String value = jedis.get("key");
System.out.println(value);
} finally {
// Close the Jedis instance when you're finished with it
jedis.close();
}
}
}
In this example, we create a Jedis instance using the localhost and port 6379, which is the default port for Redis. We then use the set() method to set a value in Redis, and the get() method to retrieve the value.
Additional Tips
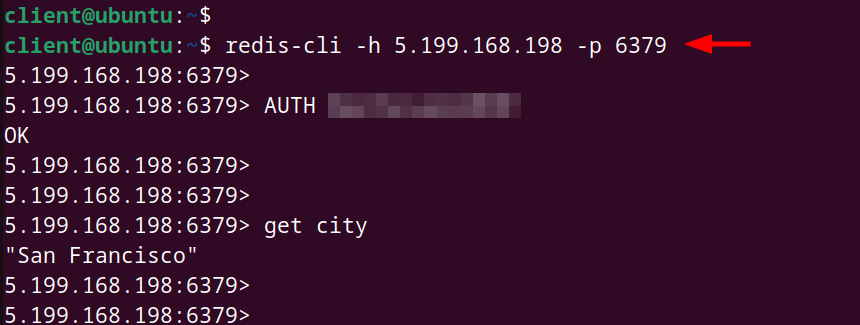
Make sure you have the necessary permissions to install and run Redis on your Ubuntu system. You can adjust the configuration of your Redis instance by editing the/etc/redis/redis.conf file. You can connect to your Redis instance using a tool like redis-cli or a GUI client like RedisDesktopManager.
I hope this helps! Let me know if you have any questions.
How to add Redis in Java?
I'd be happy to help you with that!
Adding Redis to your Java application is a straightforward process. Here's a step-by-step guide to get you started:
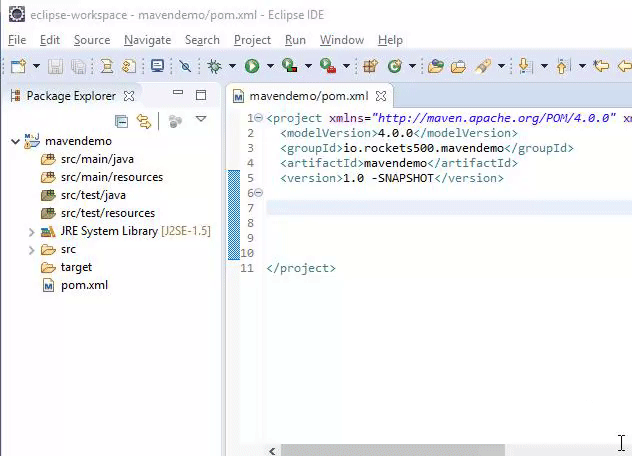
pom.xml file (if you're using Maven):
redis
jedis
2.9.0
Or, if you're not using Maven, you can download the JAR file from the official Jedis repository and add it to your project manually.
Create a Redis connection: Once you have Jedis in your project, you need to create a connection to the Redis server. This involves creating an instance of theJedis class and passing the host and port information:
import redis.clients.jedis.Jedis;
import redis.clients.jedis.JedisPoolConfig;
// Replace 'localhost' and '6379' with your Redis server's IP and port
Jedis jedis = new Jedis("localhost", 6379);
// Set a value: 'key' with the value 'Hello, world!'
jedis.set("key", "Hello, world!");
// Get the value for the key
String value = jedis.get("key");
System.out.println(value); // prints 'Hello, world!'
// Delete the key
jedis.del("key");
// Check if the key exists
boolean exists = jedis.exists("key");
System.out.println(exists); // prints false
// Flush all data from Redis
jedis.flushAll();
jedis.close();
That's it! You now have a basic understanding of how to add Redis to your Java application using Jedis.
Additional tips and considerations:
Make sure you have the correct version of Jedis for your Java version. The latest version is usually compatible with recent Java versions. If you're using Maven, make sure to update yourpom.xml file after adding the Jedis dependency. For production environments, consider using a connection pool (like JedisPool) to handle multiple connections efficiently. Check out the official Jedis documentation for more advanced topics like transactions, pub/sub messaging, and Lua scripting.
I hope this helps! Let me know if you have any further questions.