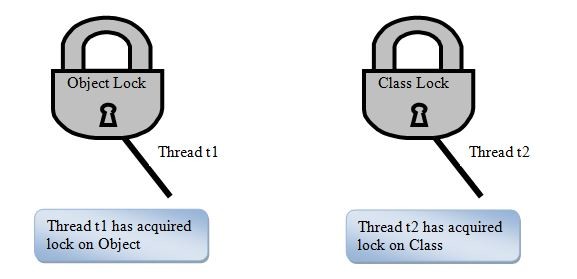
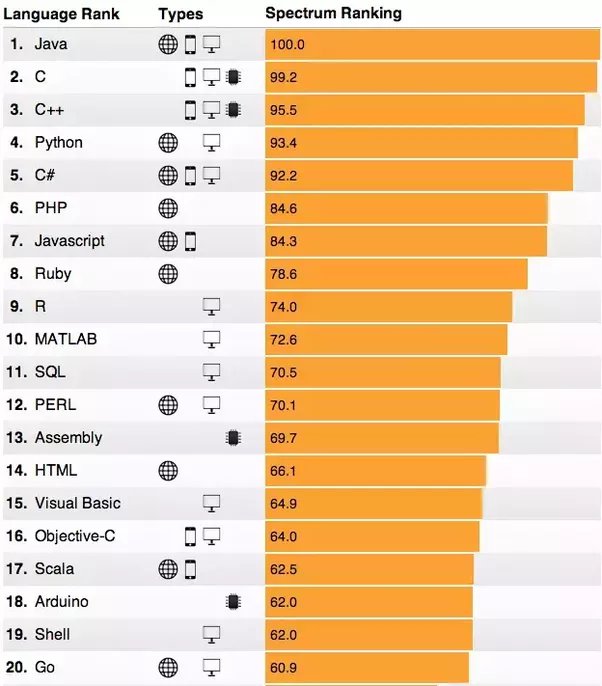
redis with java/spring boot
redis with java/spring boot
I'm happy to respond in English this time!
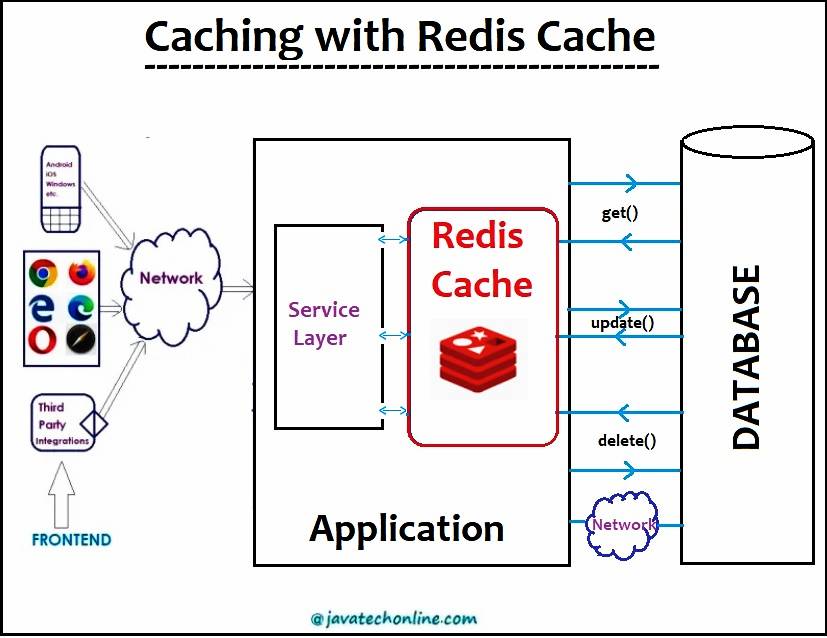
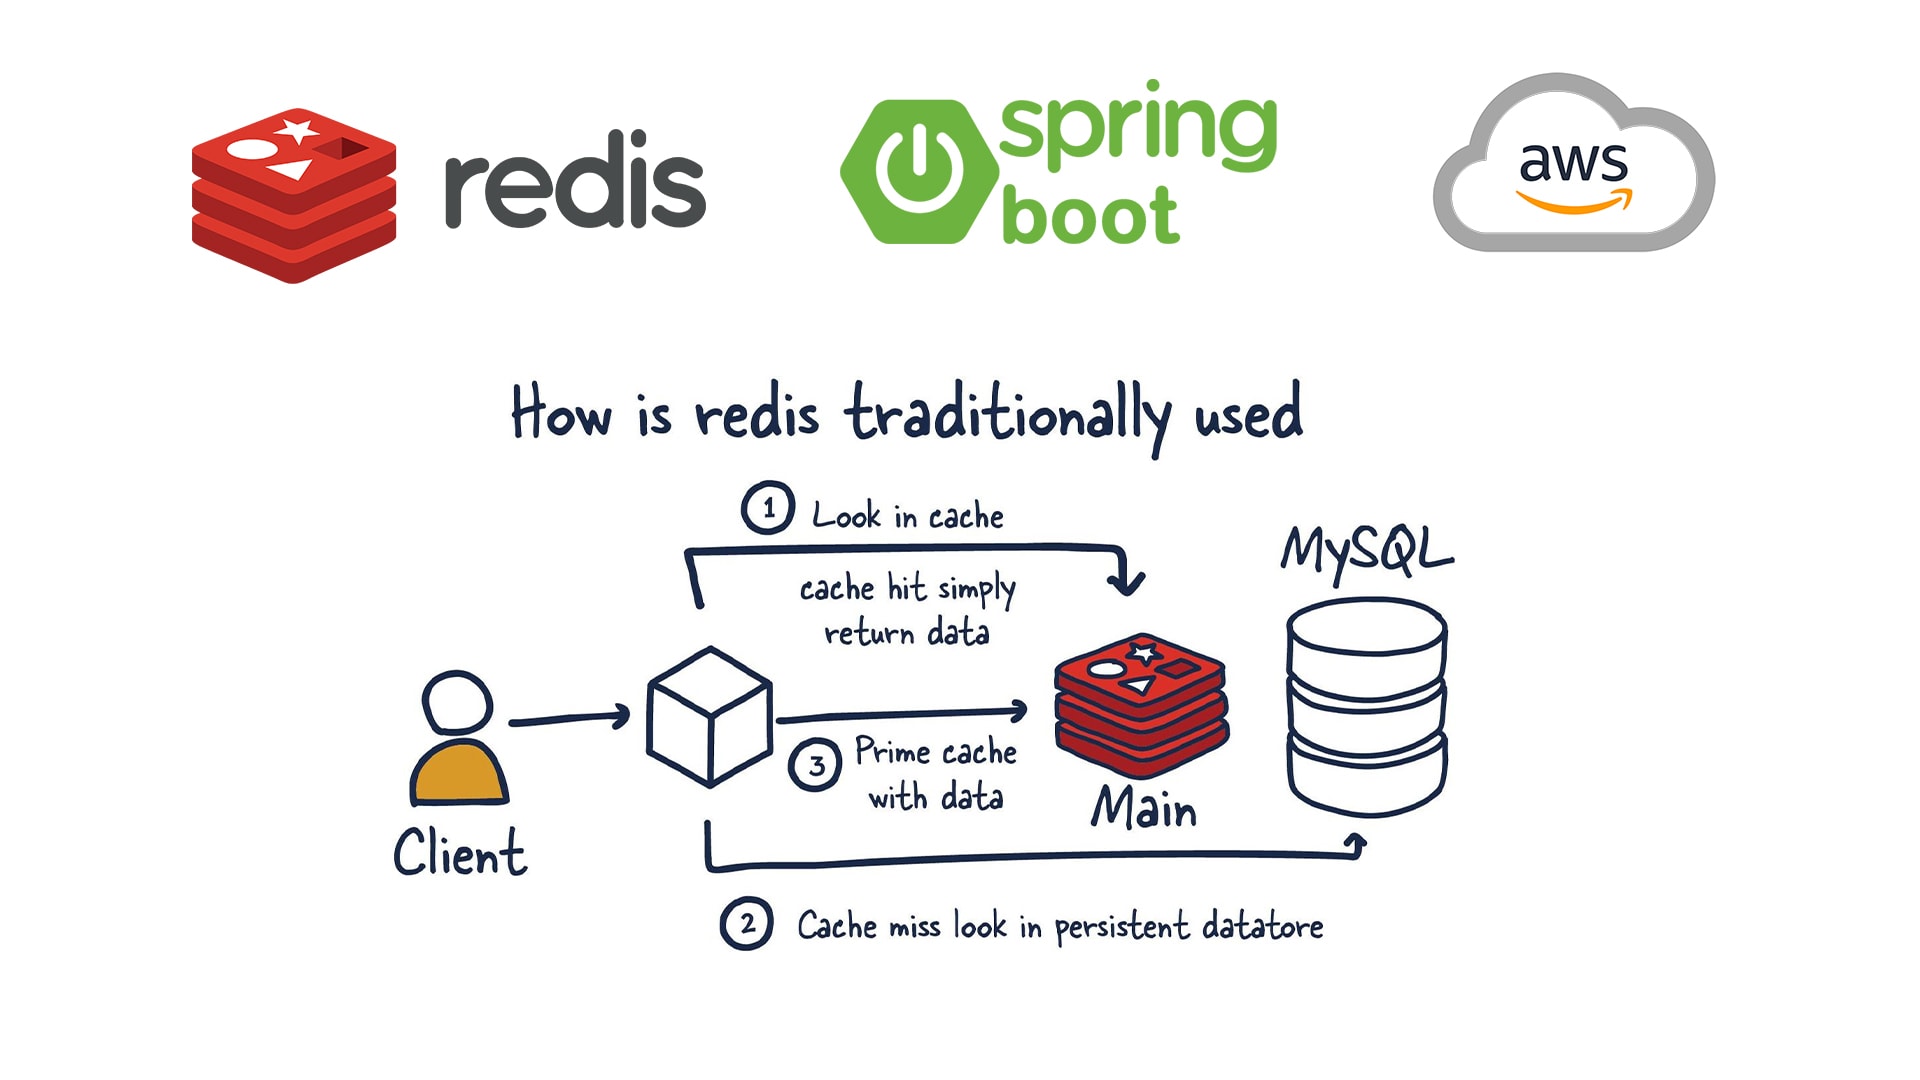
To start with, Redis is a popular open-source, NoSQL database that stores data in memory and persists it to disk. It's designed to be fast, flexible, and easy to use. In the context of Java/Spring Boot, Redis can be used as a cache layer or a message broker.
Here are some reasons why you might want to use Redis with your Java/Spring Boot application:
To use Redis with your Java/Spring Boot application, you'll need to:
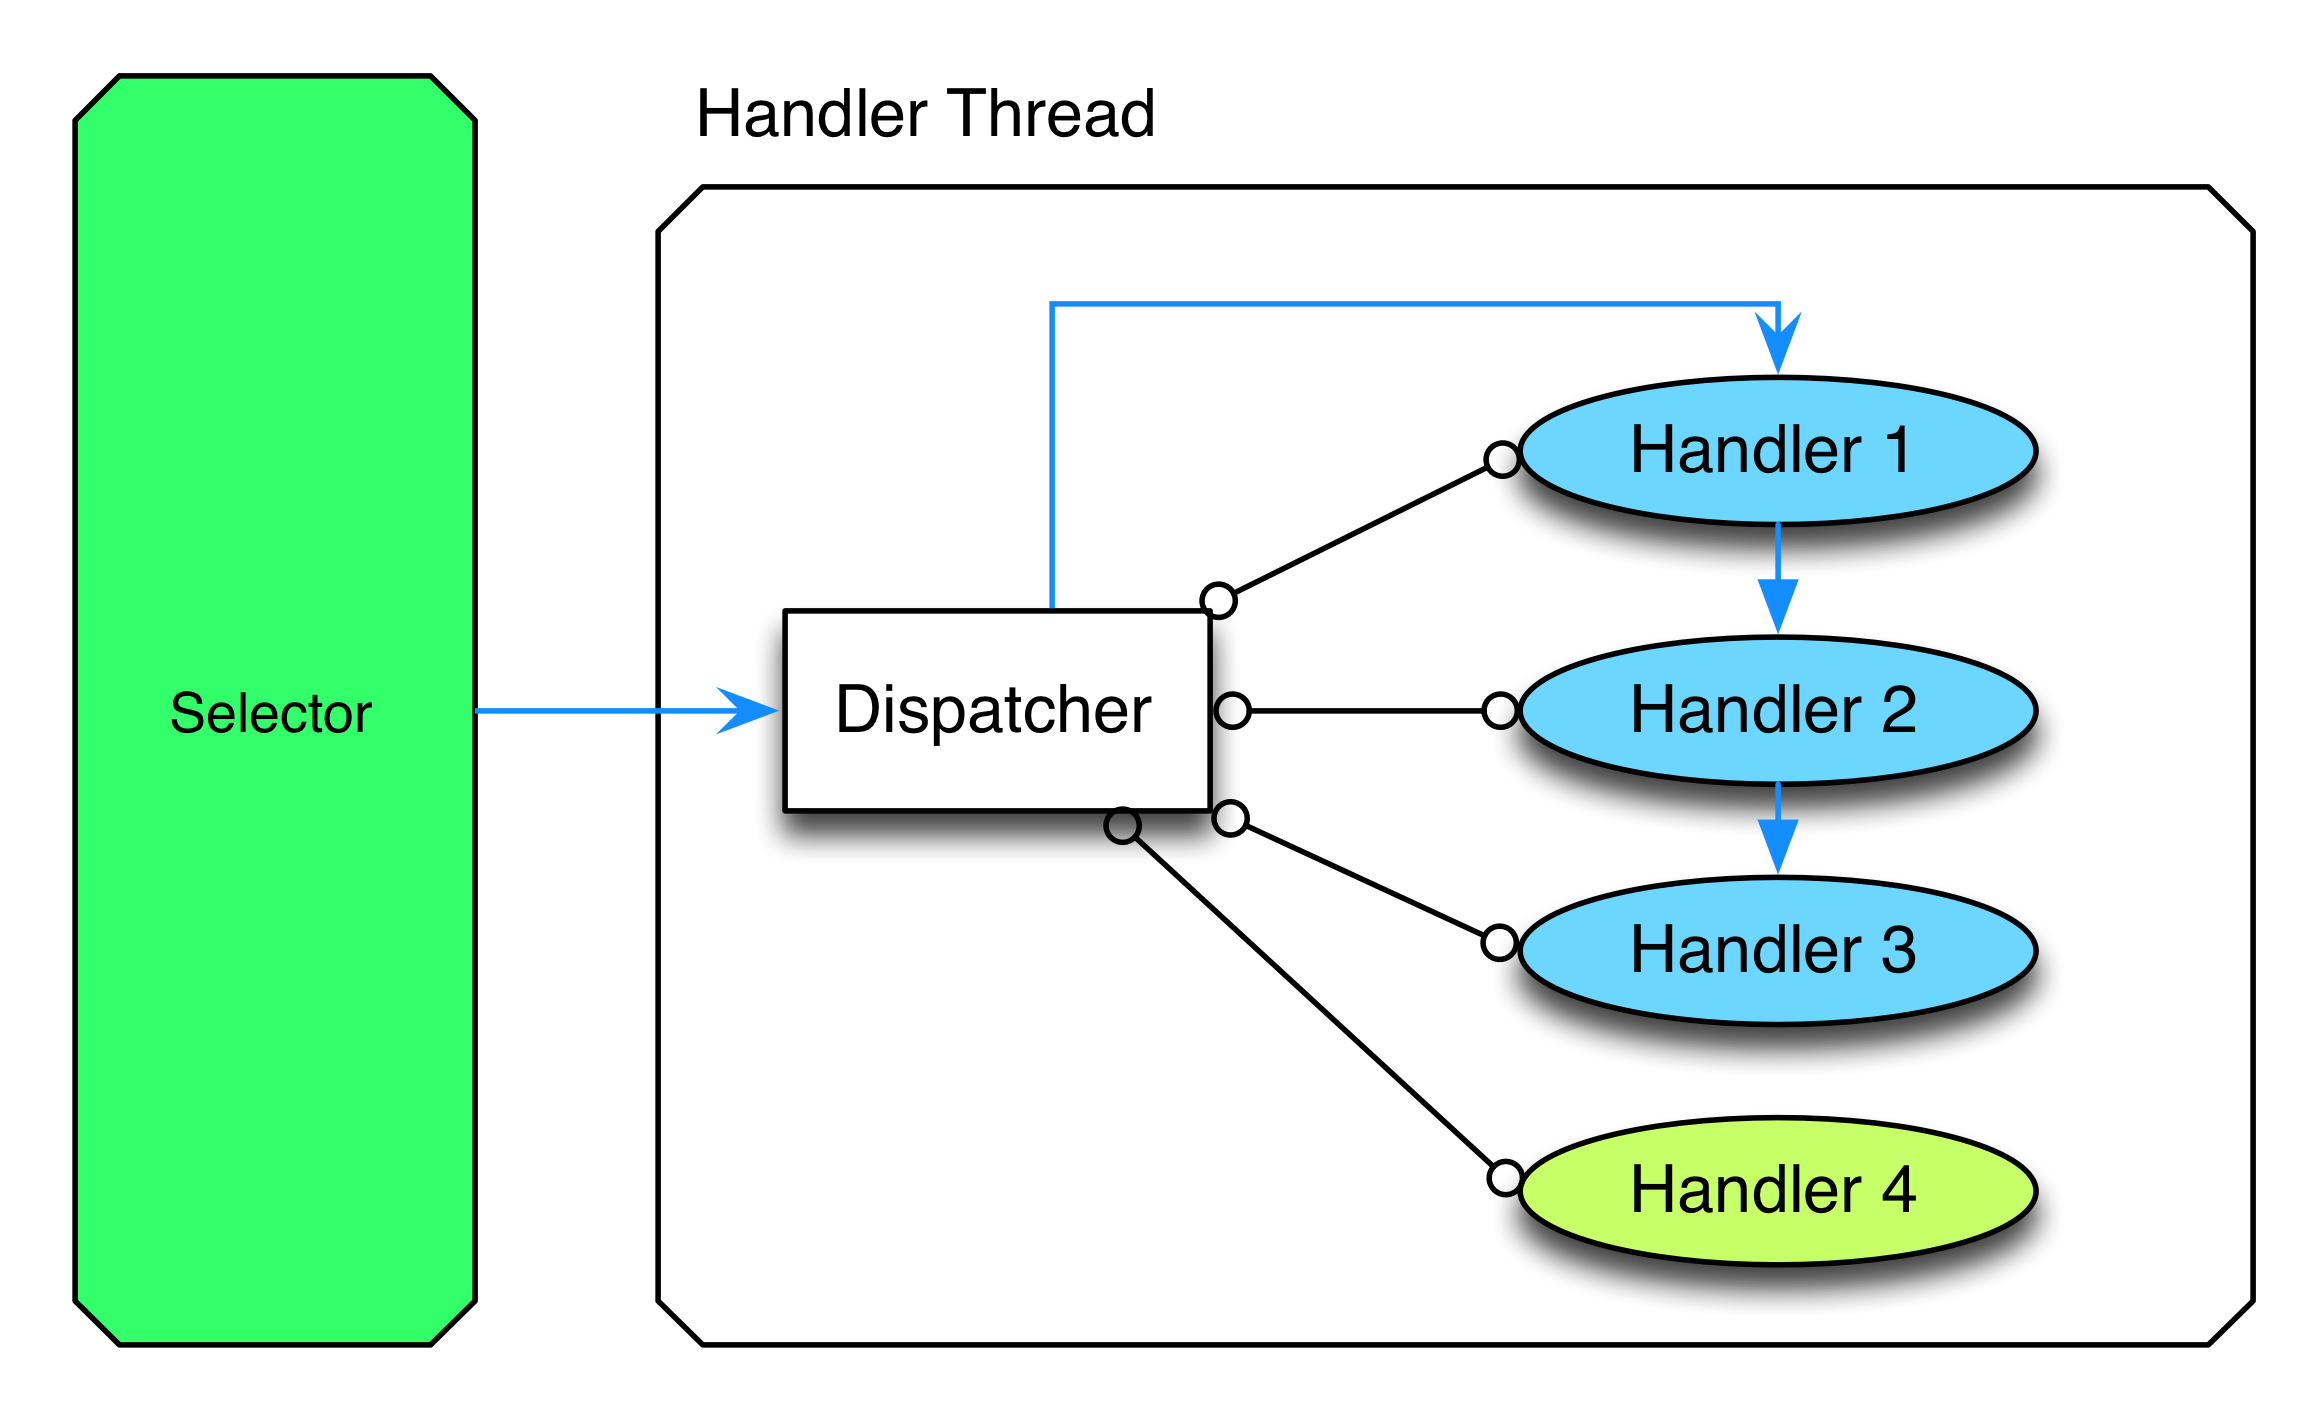
Install the Redis dependency in your Maven or Gradle project. Configure the Redis connection using Spring Boot's@Bean configuration. Use a Redis template class (e.g., Jedis) to interact with the Redis database.
Here are some examples of how you might use Redis in your Java/Spring Boot application:
Storing user sessions:redisTemplate.opsForValue().set("user:session", "12345"); Caching computed values: redisTemplate.opsForValue().set("cached-value", "Hello, World!"); Publishing messages to a topic: jedis.publish("my-topic", "New message!");
When choosing Redis as a caching layer or message broker for your Java/Spring Boot application, keep the following best practices in mind:
Cache expiration: Set cache expiration times to avoid storing stale data. Key naming conventions: Use consistent and descriptive key naming conventions to make it easier to maintain and debug your code. Connection pooling: Consider using connection pooling mechanisms to reduce the overhead of creating new Redis connections.In conclusion, Redis is a powerful tool that can greatly enhance the performance and scalability of your Java/Spring Boot application. By understanding how to use Redis effectively, you can unlock its full potential and improve the overall user experience of your application.
Java redis download
I'd be happy to help!
To download Java Redis, you can follow these steps:
Method 1: Download from Official Website
Go to the official Redis website at https://redis.io/download. Click on the "Java" tab and select your desired version (Redis 6 or Redis 5). Choose the package type (e.g., ZIP, TAR.GZ, or RPM) that suits your system. Download the Java Redis server package (redis-server.jar) and save it to a location on your computer.Method 2: Use Maven
If you have Apache Maven installed, you can use the following command in your terminal/command prompt:mvn org.apache.commons:commons-lang3:3.12:jar
This will download the Redis Java client library and its dependencies.
Method 3: Use Gradle
If you have Gradle installed, you can add the following dependency to your build.gradle file:dependencies {implementation 'org.apache.commons:commons-lang3:3.12'
}
Then, run gradle assemble to download and install the dependencies.
Method 4: Use Intellij IDEA
If you're using IntelliJ IDEA as your IDE, you can use the Maven or Gradle plugin to download the Redis Java client library. In the project structure view, right-click on the "Dependencies" node and select "Download Maven/Gradle package". Choose the Redis Java client library package and follow the installation instructions.Additional Information
Once you've downloaded the Java Redis server package or added the dependencies to your build tool, you can use theredis-cli command-line tool to interact with the Redis database. To start the Redis server, run the following command:
java -jar redis-server.jar
This will start a standalone instance of the Redis server.
Remember to always check the official Redis documentation for the most up-to-date information on installing and using Java Redis.