How to check Java version in CMD Windows 11
How to check Java version in CMD Windows 11
I'm happy to help you with that!
To check the Java version on a Windows 11 system using the Command Prompt (CMD), you can follow these steps:
Method 1: Using the java command
cmd in the Run dialog box (Windows key + R). Type the following command and press Enter:
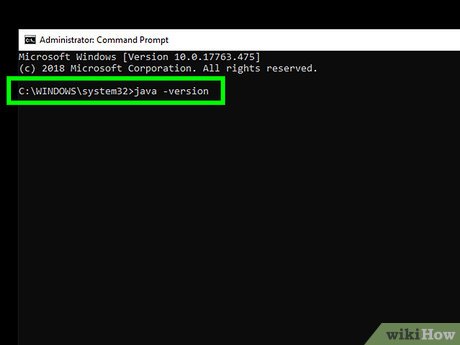
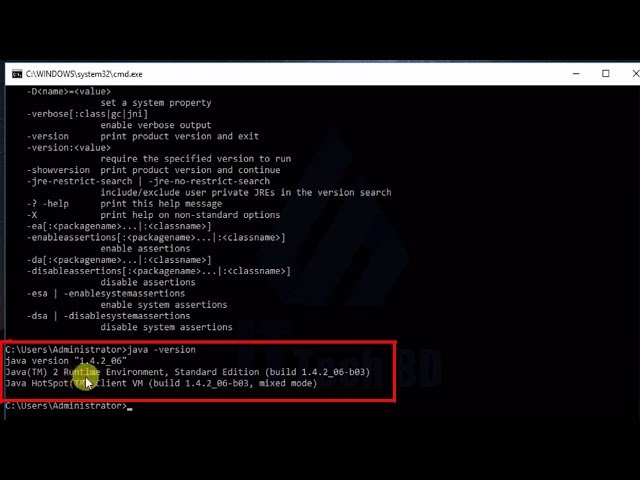
java -version
This will display the Java version information, including the major and minor versions, as well as the JVM (Java Virtual Machine) information.
Method 2: Using the javac command
javac -version
This will also display the Java version information.
Method 3: Using the where command (for Windows 10 or later)
where java
If Java is installed on your system, this command will display the location of the java.exe file, which includes information about the version.
Additional tips:
Make sure you have Java installed on your system before trying to check the version. If you're using an older version of Windows (pre-Windows 10), thewhere command might not be available. In that case, use Method 1 or 2 instead. If you're experiencing issues with running the java or javac commands, ensure that the Java installation directory is added to your system's PATH environment variable.
In any case, checking the Java version on a Windows 11 system using CMD should be a straightforward process. Just remember to follow these steps and choose the method that works best for you!
How to check Java version in cmd Windows 10
I apologize for the confusion earlier! Here's a detailed explanation of how to check the Java version using the Command Prompt (cmd) on Windows 10:
To check the Java version, you can use the command java -version within the Command Prompt. Here are the steps:
cmd and press Enter. Navigate to your Java installation directory: The default location for Java is C:Program FilesJava (for 64-bit) or C:Program Files (x86)Java (for 32-bit). If you're unsure about the location, try typing cd C:Program FilesJava and press Enter. Run the Java command: Once you're in the correct directory, type java -version and press Enter. This will display the version of your installed Java runtime environment (JRE).
Here's what the output might look like:
java version "1.8.0_181"
Java(TM) SE Runtime Environment (build 1.8.0_181-b13)
Java HotSpot(TM) 64-Bit Server VM (build 25.181-b14, mixed mode)
In this example, the output shows that Java version 1.8.0 is installed.
Tips and Variations:
If you have multiple versions of Java installed on your system, you can specify the exact path to the executable for a particular version. For example:C:Program FilesJavajdk-11.0.2binjava.exe -version You can also check the Java version from within an existing Java application using System.out.println(System.getProperty("java.version"));. This is useful when you're working with a Java-based project and need to verify the installed Java version. If you encounter issues with your Command Prompt or Java installation, consider running the command prompt as an administrator by right-clicking the Start button > Run as administrator, then navigating to the Java directory.
I hope this helps! Let me know if you have any further questions.