How do I download Java 64-bit?
How do I download Java 64-bit?
I'm happy to help you with that! Here are the steps to download and install Java 64-bit:
Step 1: Check if your computer supports 64-bit

Before downloading, ensure your computer is running a 64-bit operating system (such as Windows 10, macOS High Sierra or later). If not, you may need to update or change your operating system.
Step 2: Go to the official Oracle Java website

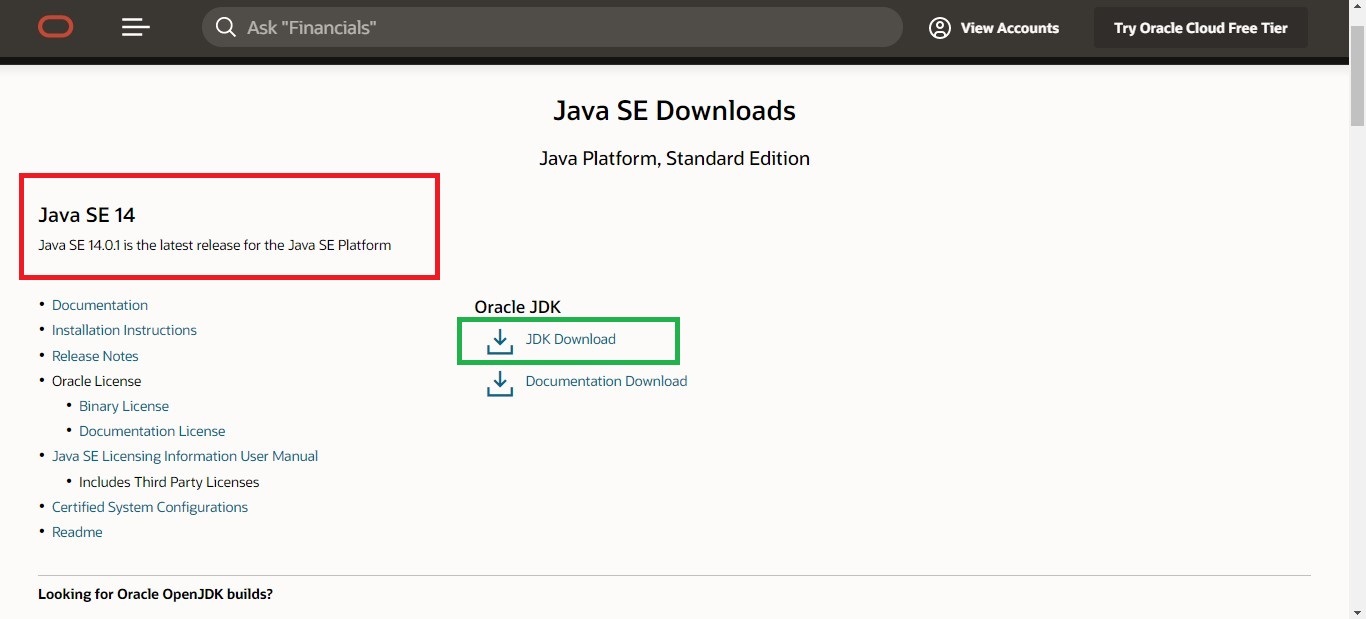
Visit the official Oracle Java website at www.oracle.com/technetwork/java/index.html.
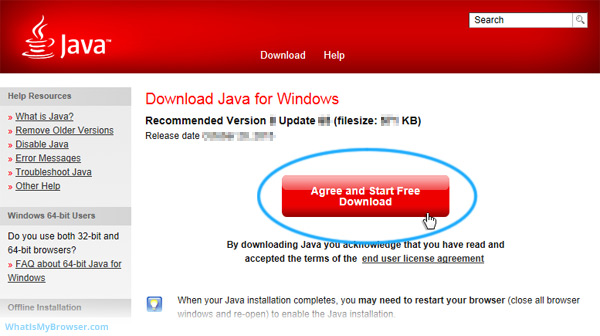
Step 3: Click on "Free Download"

Scroll down and click on the "Free Download" button under the "Java SE" or "Oracle JDK" section (depending on your needs). Make sure you select the 64-bit version.
Step 4: Choose the correct download type
You'll be presented with a few options:
Offline Installation: This is recommended, as it allows you to install Java without needing an internet connection. Online Installation: If you're connected to the internet, this option will install Java immediately.Choose the "offline installation" for a more stable and faster download.
Step 5: Select the correct operating system
Select your operating system (Windows or macOS) and choose the 64-bit version.
Step 6: Download the installer package
Click on the "Download" button to start the download. Depending on your internet connection, this might take a few minutes.
Step 7: Run the installer
Once the download is complete, run the installer (usually named java-8uXXXX.exe or similar).
Step 8: Follow the installation wizard
Follow the installation wizard's prompts to install Java. Be sure to choose the correct directory and settings for your system.
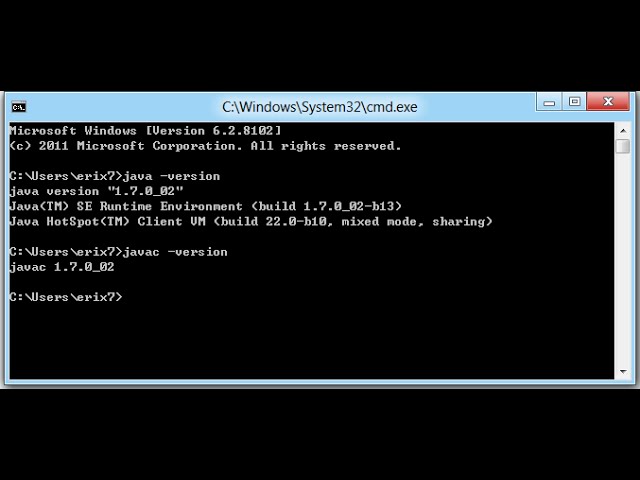
Step 9: Verify the installation
Once the installation is complete, verify that Java is installed correctly by opening a Command Prompt or Terminal window and typing java -version. This should display the version of Java you just installed.
That's it! You now have Java 64-bit installed on your computer. If you encounter any issues during the installation process, refer to Oracle's official documentation or seek assistance from a technical expert.
Remember to always download software from reputable sources and be cautious when installing unfamiliar programs.
java download 64-bit windows 7

I'd be happy to help you with that!
To download and install Java on a 64-bit Windows 7 system, follow these steps:
Step 1: Download the correct version of Java
Go to the official Oracle Java website at www.oracle.com/technetwork/java/index.html. Click on "Download" and then select "Java SE (Standard Edition)" from the drop-down menu.
In the next window, select "Windows" as your platform, "x86" or "x64" depending on your system architecture, and choose the latest available version of Java. For Windows 7, you'll want to download the 64-bit version since it's a 64-bit operating system.
Step 2: Save the downloaded installer
Once the download is complete, save the file to a location on your computer, such as the desktop or downloads folder.
Step 3: Run the Java installation wizard
Locate the downloaded installer and double-click it to run the installation wizard. Follow the prompts to begin the installation process.
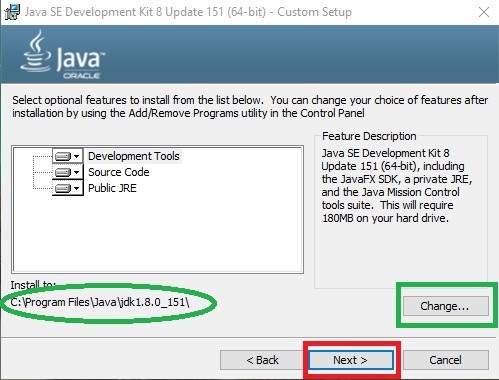
Step 4: Choose the installation type
In the "Choose Installation Type" window, select "Custom" as your installation type. This will allow you to customize the installation and choose which components to install.
Step 5: Install Java Development Kit (JDK) or Standard Edition (SE)
Select either the JDK (Java Development Kit) or SE (Standard Edition), depending on your needs. The JDK includes development tools like the compiler and debugger, while the SE is suitable for general-purpose use and doesn't include these development tools.
Step 6: Install Java Runtime Environment (JRE)
In the "Choose Components" window, make sure to select the JRE (Java Runtime Environment) component. This will install the runtime environment required to run Java applications.
Step 7: Choose installation location
Select the installation location for Java. You can choose to install it in the default location or specify a custom path.
Step 8: Finish the installation process
Follow the prompts to complete the installation process. Once finished, you'll see a confirmation message indicating that Java has been successfully installed on your system.
Step 9: Verify Java installation (optional)
To verify that Java is installed correctly, open a command prompt or terminal window and type java -version. This will display the version of Java installed on your system.
That's it! You have now successfully downloaded and installed Java on your 64-bit Windows 7 system.