Java Spring Boot project
Java Spring Boot project
I'd be happy to help with your Java Spring Boot project!
A Spring Boot project is a type of web application that uses the Spring Framework, which is a popular framework for building Java-based applications. Spring Boot simplifies the process of creating a Spring-based application by providing many pre-configured options and reducing the boilerplate code that you need to write.
To start a new Spring Boot project, you can use the Spring Initializr tool, which allows you to select the dependencies and features that you want in your project. For example, if you want to create a web application, you would select the "Web" dependency. If you want to add a database connection, you would select the "Database" dependency.
Once you have selected the dependencies for your project, Spring Initializr will generate a basic directory structure and configuration files for you. This includes the following:
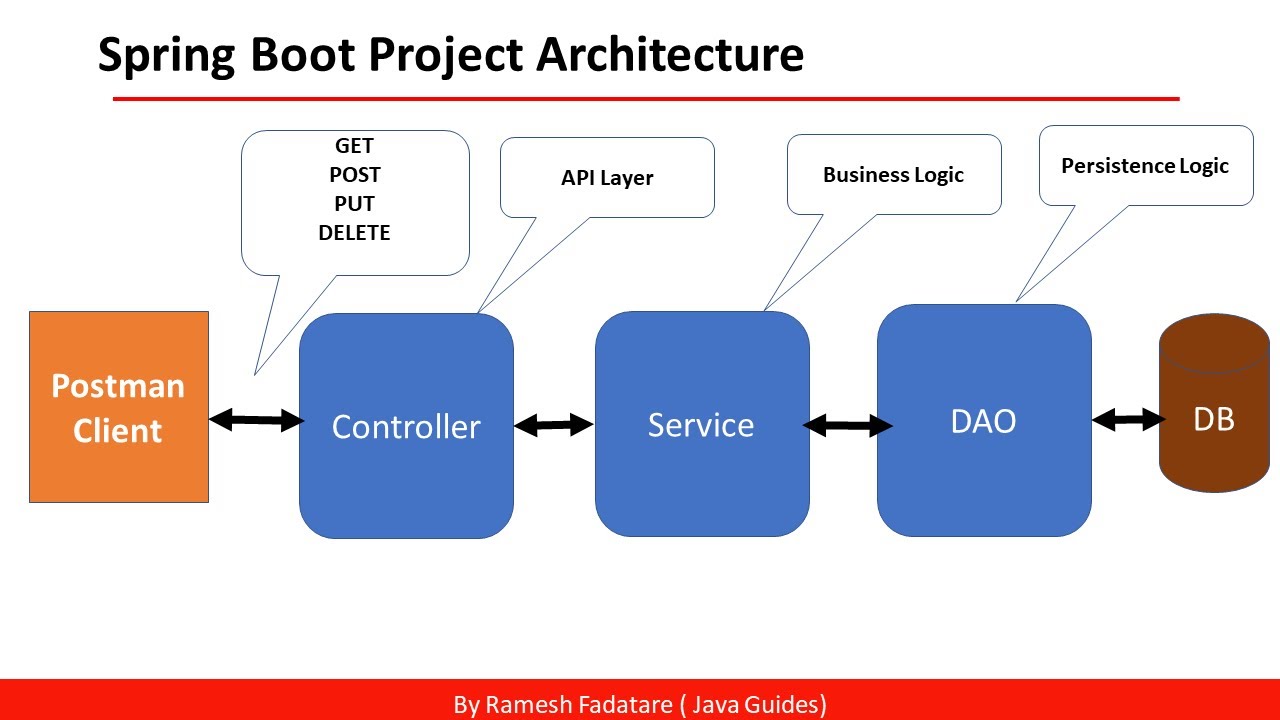
pom.xml: This is the Maven build file that defines the dependencies required by your project. application.properties: This is a properties file that allows you to configure various settings for your application, such as the database connection details. application.yml: This is a YAML file that contains more configuration options for your application.You can then use an Integrated Development Environment (IDE) or text editor to modify these files and add additional code to implement the features that you want in your application. For example, you might create a controller class to handle HTTP requests, or a service class to encapsulate business logic.
When you run your Spring Boot project, the application will be started automatically using the embedded Tomcat server. You can then access your web application by navigating to the URL specified in your application's configuration files.
Here are some key benefits of using Spring Boot:
Simplified setup and configuration: Spring Boot provides many pre-configured options that simplify the process of setting up a new project. Reduced boilerplate code: Spring Boot reduces the amount of code you need to write by providing many default values for common settings and dependencies. Flexible configuration: Spring Boot allows you to configure your application using various methods, including Java-based configuration files and YAML files. Easy testing: Spring Boot provides many features that simplify the process of writing and running unit tests for your application.Overall, Spring Boot is a great choice for building a web application with Java, as it simplifies the setup and configuration process and reduces the amount of boilerplate code you need to write.
java spring boot tutorial
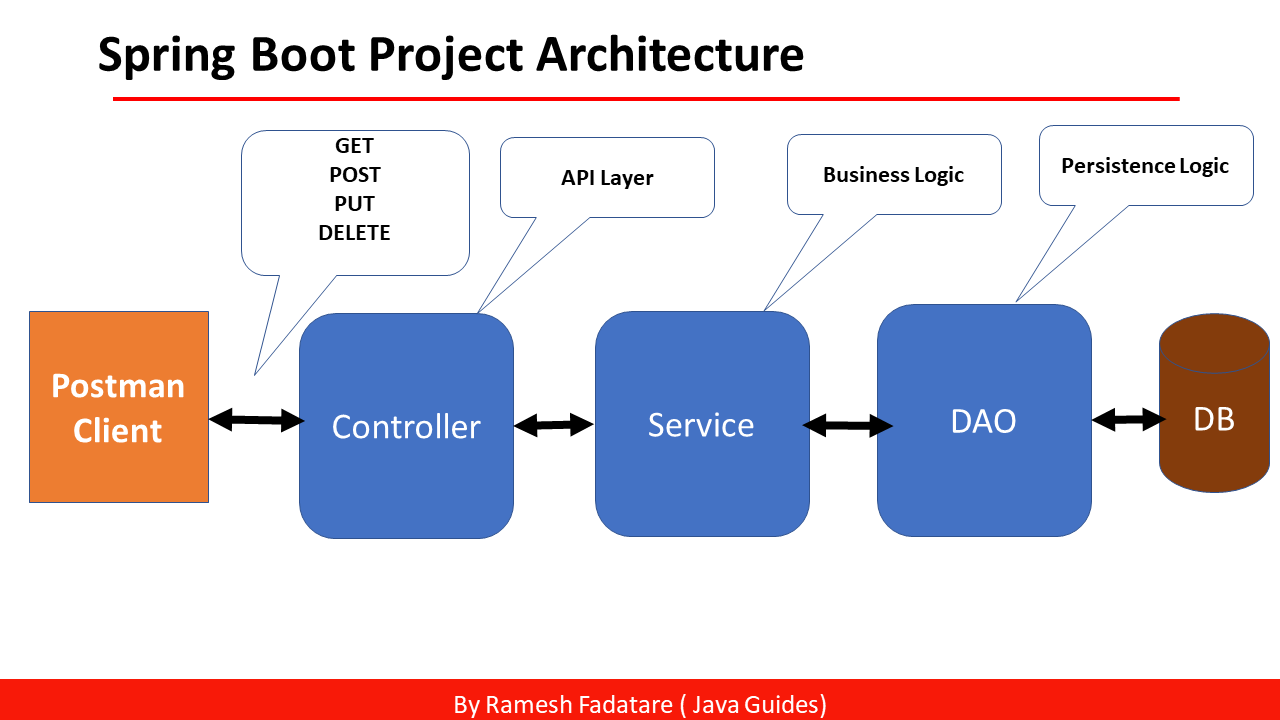
I'd be happy to provide a comprehensive Java Spring Boot tutorial! Here's a detailed guide on how to build a RESTful API using Spring Boot:
Step 1: Set up the Project Structure
To start, let's set up our project structure. Create a new directory for your project and inside it, create the following subdirectories:
myproject/myproject/src/main/java/
com/example/myapp/Application.java
com/example/myapp/controllers/
UserController.java
ProductController.java
...
com/example/myapp/models/
User.java
Product.java
...
com/example/myapp/repositories/
UserRepository.java
ProductRepository.java
...
src/main/resources/
application.properties
logback.xml
Step 2: Add the Spring Boot Dependencies
In your pom.xml file (if you're using Maven) or your build.gradle file (if you're using Gradle), add the following dependencies:
org.springframework.boot
spring-boot-starter-web
dependencies {
implementation 'org.springframework.boot:spring-boot-starter-web'
}
Step 3: Create the Application Configuration
Create a new file called application.properties in your src/main/resources directory:
spring.datasource.url=jdbc:postgresql://localhost:5432/mydbspring.datasource.username=myuser
spring.datasource.password=mypassword
server.port=8080
spring.jpa.hibernate.ddl-auto=update
This sets up the database connection, server port, and Hibernate configuration.
Step 4: Create the Model Classes
Create two new classes, User.java and Product.java, in your com/example/myapp/models directory:
// User.java@Entity
public class User {
@Id
@GeneratedValue(strategy = GenerationType.IDENTITY)
private Long id;
private String name;
private String email;
// getters and setters
}
// Product.java
@Entity
public class Product {
@Id
@GeneratedValue(strategy = GenerationType.IDENTITY)
private Long id;
private String name;
private Double price;
// getters and setters
}
Step 5: Create the Repository Classes
Create two new classes, UserRepository.java and ProductRepository.java, in your com/example/myapp/repositories directory:
// UserRepository.javapublic interface UserRepository extends JpaRepository<User, Long> {
}
// ProductRepository.java
public interface ProductRepository extends JpaRepository<Product, Long> {
}
Step 6: Create the Controller Classes
Create two new classes, UserController.java and ProductController.java, in your com/example/myapp/controllers directory:
// UserController.java@RestController
@RequestMapping("/users")
public class UserController {
@Autowired
private UserRepository userRepository;
// GET /users
public List getUsers() {
return userRepository.findAll();
}
// POST /users
public User createUser(User user) {
return userRepository.save(user);
}
}
// ProductController.java
@RestController
@RequestMapping("/products")
public class ProductController {
@Autowired
private ProductRepository productRepository;
// GET /products
public List getProducts() {
return productRepository.findAll();
}
// POST /products
public Product createProduct(Product product) {
return productRepository.save(product);
}
}
Step 7: Start the Application
Start your Spring Boot application using the mvn spring-boot:run command (if you're using Maven) or gradle bootRun (if you're using Gradle).
Step 8: Test the API
Using a tool like Postman, send GET requests to /users and /products to retrieve all users and products. You can also send POST requests with JSON bodies containing new user or product data.
That's it! This tutorial should give you a good starting point for building your own RESTful API using Java and Spring Boot.
