Java async annotation example
Java async annotation example

Here's an example of a Java async annotation using the Spring Framework and its annotation-based programming model:
Let's assume we have a service class MyService that has a method performAsyncTask() which takes a long time to execute. We want to annotate this method with @Async so that it runs asynchronously.
@Service
public class MyService {
@Async("taskExecutor")
public void performAsyncTask() {
// Simulate some lengthy operation
for (int i = 0; i < 10000; i++) {
Thread.sleep(10);
System.out.println("Iteration " + i + " of a very long task");
}
}
}
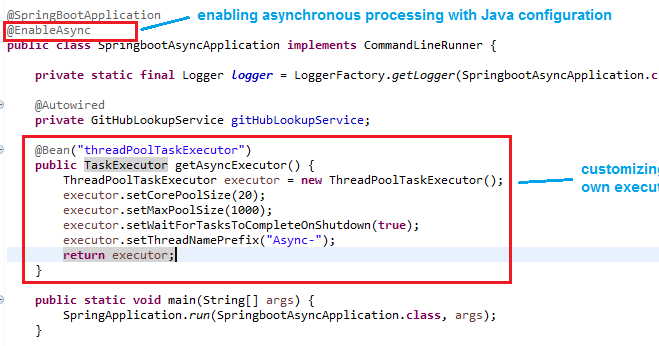
In the above example, @Async is used to mark the performAsyncTask() method as an asynchronous task. The argument "taskExecutor" is a reference to the Spring Task Executor that will be used to execute this task.
Here's how we can configure the task executor in our application context:
@Configuration
public class AppConfig {
@Bean
public AsyncTaskExecutor taskExecutor() {
SimpleAsyncTaskExecutor simpleAsyncTaskExecutor = new SimpleAsyncTaskExecutor();
simpleAsyncTaskExecutor.setConcurrencyLimit(5);
return simpleAsyncTaskExecutor;
}
}
In the above example, we are using a SimpleAsyncTaskExecutor to execute our tasks. This executor will create a new thread for each task and limit the number of concurrent threads to 5.
Now, let's see how we can use this service class from another part of our application:
@RestController
public class MyController {
@Autowired
private MyService myService;
@GetMapping("/start-task")
public String startAsyncTask() {
myService.performAsyncTask();
return "Started the async task";
}
}
In the above example, we are using the MyService to start an asynchronous task. The performAsyncTask() method will be executed asynchronously and the control will immediately return back to our controller.
We can also use the @Async annotation on a method of a class that implements the InitializingBean interface to trigger the asynchronous execution of the method after the bean has been initialized:
public class My InitializingBean implements InitializingBean {
@Override
public void afterPropertiesSet() throws Exception {
performAsyncTask();
}
@Async("taskExecutor")
public void performAsyncTask() {
// Simulate some lengthy operation
for (int i = 0; i < 10000; i++) {
Thread.sleep(10);
System.out.println("Iteration " + i + " of a very long task");
}
}
}
In the above example, the performAsyncTask() method will be executed asynchronously after the bean has been initialized.
That's it! This is a basic example of using Java annotations to create asynchronous tasks in Spring.
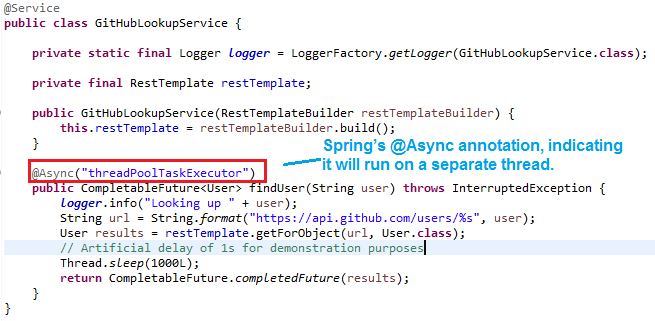
What is the use of @async annotation in Java?
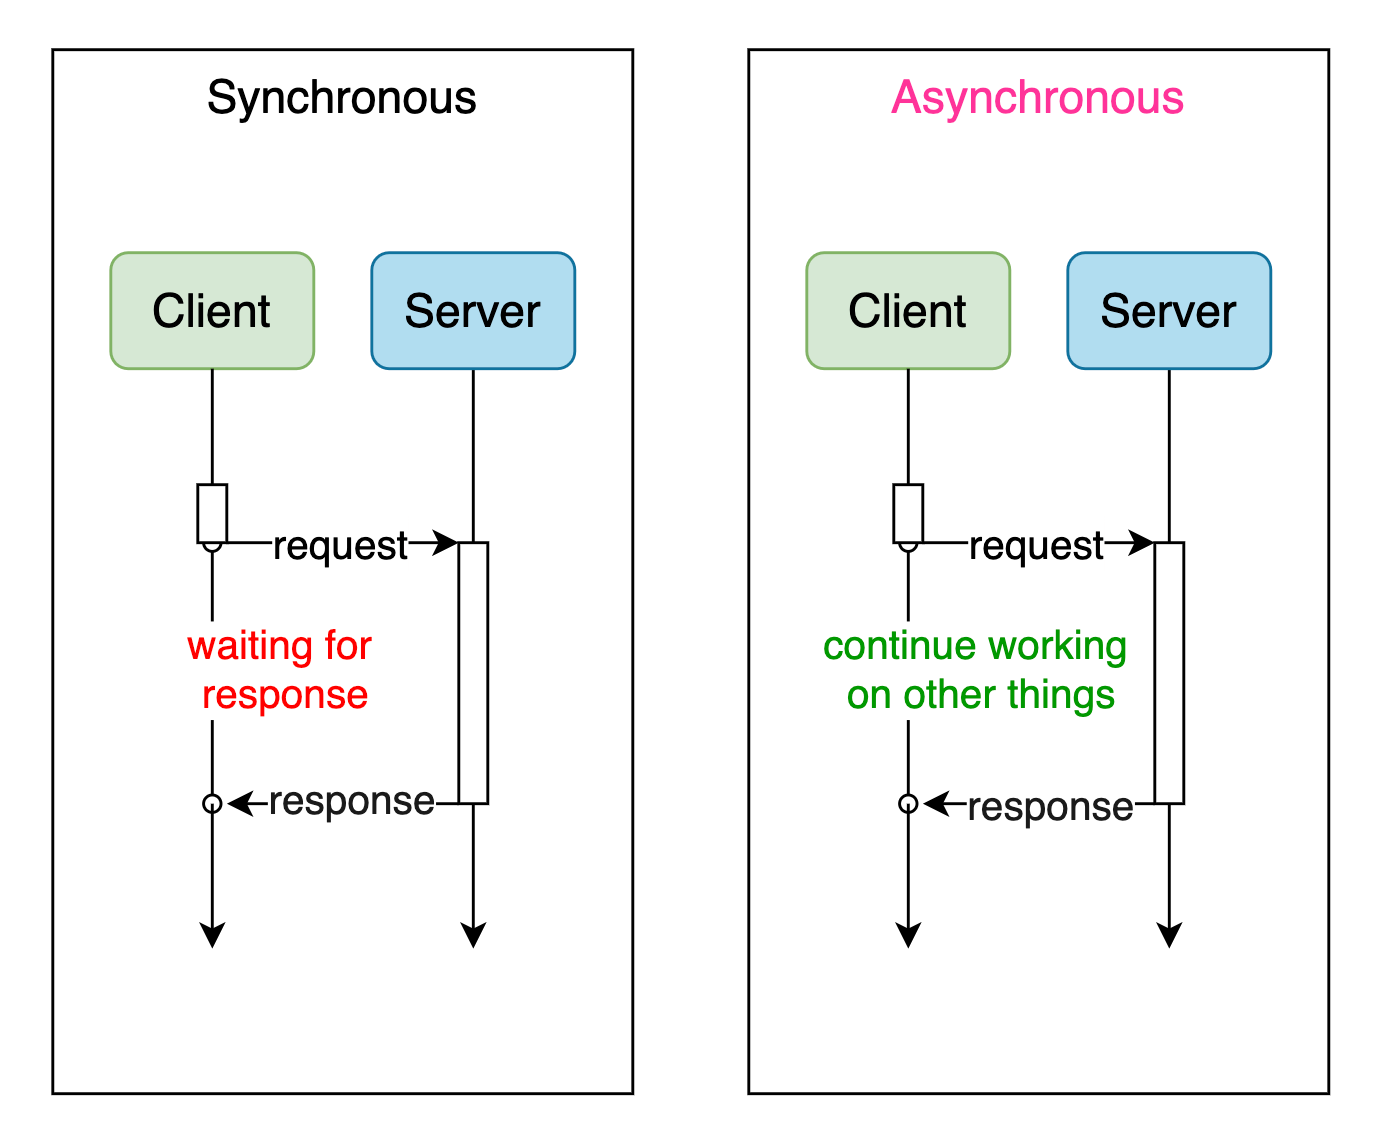
The @Async annotation in Java is used to mark a method as asynchronous, which allows it to run independently from the rest of the program's flow. This means that when a method is marked with @Async, it will execute in a separate thread, without blocking the main thread.

When you mark a method with @Async, the Spring Framework (which provides this annotation) creates a new Thread or uses an existing one to run the annotated method. This allows your program to perform other tasks while the asynchronous method is running, improving overall performance and responsiveness.
Here are some key benefits of using @Async:
To use @Async effectively, you'll need to configure an ExecutorService (a thread pool) or an TaskScheduler (which manages tasks in a single-threaded environment). This is typically done by creating a bean of type TaskExecutor in your application configuration file.
Here's a simple example of how to use @Async:
@Service
public class MyService {
@Async("taskExecutor")
public Future myAsynchronousMethod() {
// simulate some long-running operation
try {
Thread.sleep(5000);
} catch (InterruptedException e) {
Thread.currentThread().interrupt();
}
return Futures.completedFuture("Result of the asynchronous method");
}
}
In this example, myAsynchronousMethod is marked as asynchronous using @Async, and it uses a TaskExecutor bean named "taskExecutor" to execute the method. The Future<String> return type indicates that the method will run asynchronously and return a result.
When you use @Async, keep in mind that you'll need to handle exceptions properly, as they can cause problems if not handled correctly. Additionally, ensure that your application configuration is set up correctly to manage the asynchronous tasks efficiently.
In summary, @Async annotation in Java allows you to mark methods as asynchronous, enabling concurrent execution and improving overall system performance, scalability, and responsiveness.