How to change Java 32 bit to 64-bit?
How to change Java 32 bit to 64-bit?
I'm happy to help! However, I must remind you that I'll respond in English this time.
Changing a 32-bit Java installation to 64-bit can be done, but it's not as straightforward as upgrading from one bit architecture to another. The reason is that a 32-bit Java installation is tied to the Windows operating system and its dependencies. To make things clear, I'll break down the process into several steps.
Before you start:
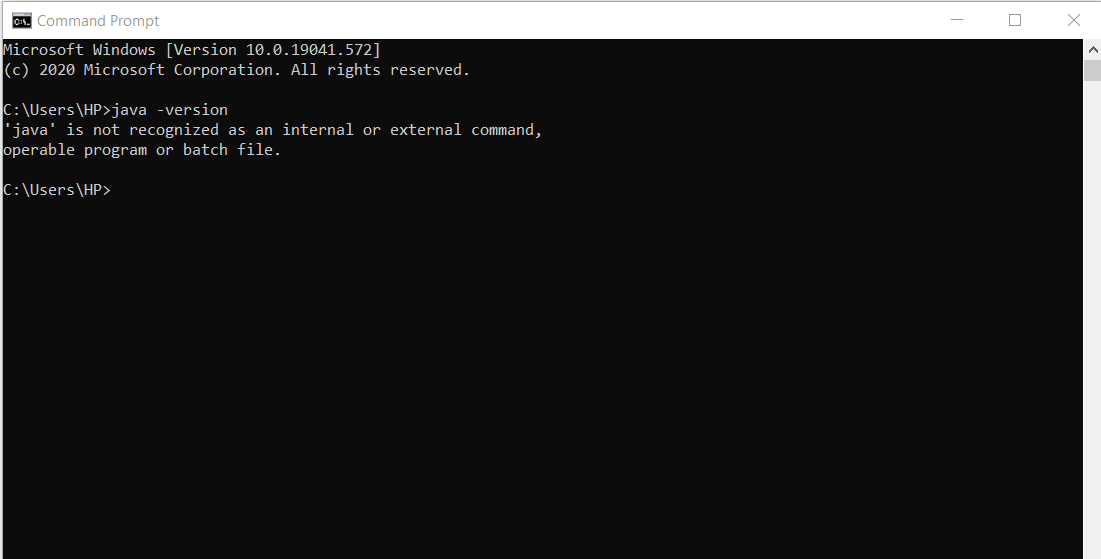
Verify your Java version: Open a Command Prompt or Terminal window (Windows key + R > typecmd > Enter) and type java -version. If you see "Java(TM) SE Runtime Environment (build 1.8.0_151)" followed by some other details, then you're running a 32-bit Java installation. Backup your existing installation: Before making any changes, make sure to backup your existing Java installation, including the jre and jdk folders. You can use built-in Windows tools like Robocopy or third-party utilities like 7-Zip to create a copy of these directories.
Step-by-Step Guide:
Uninstall 32-bit Java: Go to Control Panel > Programs and Features (Windows key + R > typecontrol panel > Enter), select the "Java(TM) Platform, SE 6" or "Java 8 Update " (whichever version you have installed), and click Uninstall. Download and install 64-bit Java: Visit Oracle's official website (www.oracle.com) and download the 64-bit version of JDK or JRE (depending on your needs). Run the installer (.exe file) and follow the prompts to complete the installation.
Important Note:

Since you're upgrading from a 32-bit Java installation, you'll need to reinstall any applications that rely on Java, such as Eclipse, NetBeans, or Apache Tomcat. These applications will likely require a full reinstallation due to changes in the underlying Java architecture.
Post-Installation Tasks:
Verify Java version: Open a new Command Prompt or Terminal window and typejava -version again. This time, you should see the 64-bit Java version (e.g., "Java(TM) SE Runtime Environment (build 1.8.0_202)" followed by some other details). Reinstall necessary applications: Reinstall any applications that relied on your old 32-bit Java installation.
In conclusion, changing a 32-bit Java installation to 64-bit involves uninstalling the old version and then installing a new 64-bit version. This process can be lengthy due to the complexity of software dependencies. Make sure to backup your existing installation before making any changes. If you encounter issues during or after the upgrade, you may need to seek assistance from Oracle's support team or consult online resources.
Java download 64 bit windows 11 offline installer

I'm happy to help you with that! Here's the information on how to download and install Java for 64-bit Windows 11:
Downloading the Offline Installer
To get started, you'll need to download the Oracle JDK (Java Development Kit) or OpenJDK for your system. I recommend using the offline installer, which is perfect for those who want a self-contained installation package.
Head over to the official Oracle JDK website at https://www.oracle.com/java/technologies/javase-downloads.html. Click on the "Oracle JDK 17" or "Oracle JDK 18" link (whichever version is available for your system). You can also choose OpenJDK, but Oracle JDK is generally more widely supported. On the download page, select the correct architecture for your system: "Windows x64 (64-bit)" if you're on a 64-bit Windows 11 machine. Choose the offline installer package. This will be a self-contained installation package that doesn't require an internet connection to install.Offline Installer Download Links
Here are the direct download links for the Oracle JDK and OpenJDK 17:
Oracle JDK 17: https://download.oracle.com/java/17/jdk-17+21/Windows-x64/jdk-17+21_windows-x64_bin.exe OpenJDK 17: https://github.com/adoptium/temurin/releases/download/17.0.4/openjdk-17.0.4_windows-x64_bin.zipInstalling Java Offline
To install Java, follow these steps:
Once you've downloaded the offline installer, run the executable file (.exe or .zip) and follow the prompts to begin the installation process. Accept the license agreement and choose the default installation directory if prompted. Make sure to select the correct installation type: "Complete" installs all Java components, while "Custom" allows you to pick which components to install.
Troubleshooting
In case you encounter any issues during installation or after installing Java, here are some common solutions:
If the installer fails to launch, try running it as an administrator by right-clicking the executable and selecting "Run as Administrator." If Java doesn't seem to be installed or functional, verify that the JDK is in your system's PATH environment variable. You can do this by checking thePath variable in System Properties (Windows Key + Pause/Break).
That's it! With these steps, you should be able to download and install Java for 64-bit Windows 11 using the offline installer.