java rest api framework
java rest api framework
I'd be happy to help!
Java is a popular programming language that can be used for building RESTful APIs (Representational State of Resource). There are several frameworks available for Java that make it easier to build RESTful APIs. Here are some of the most well-known ones:
Jersey: Jersey is one of the most widely-used Java-based RESTful API framework. It's a fully compliant JAX-RS (JSR-311) implementation. Jersey provides an easy and consistent way for developing RESTful web services using the Java programming language. It supports both HTTP GET, POST, PUT, DELETE methods. Spark: Spark is a micro-framework that provides a lightweight and flexible way to build web applications and RESTful APIs. It's designed for simplicity and ease of use, making it a great choice for small projects or prototyping. Spark includes built-in support for JSON parsing and allows you to easily handle HTTP requests.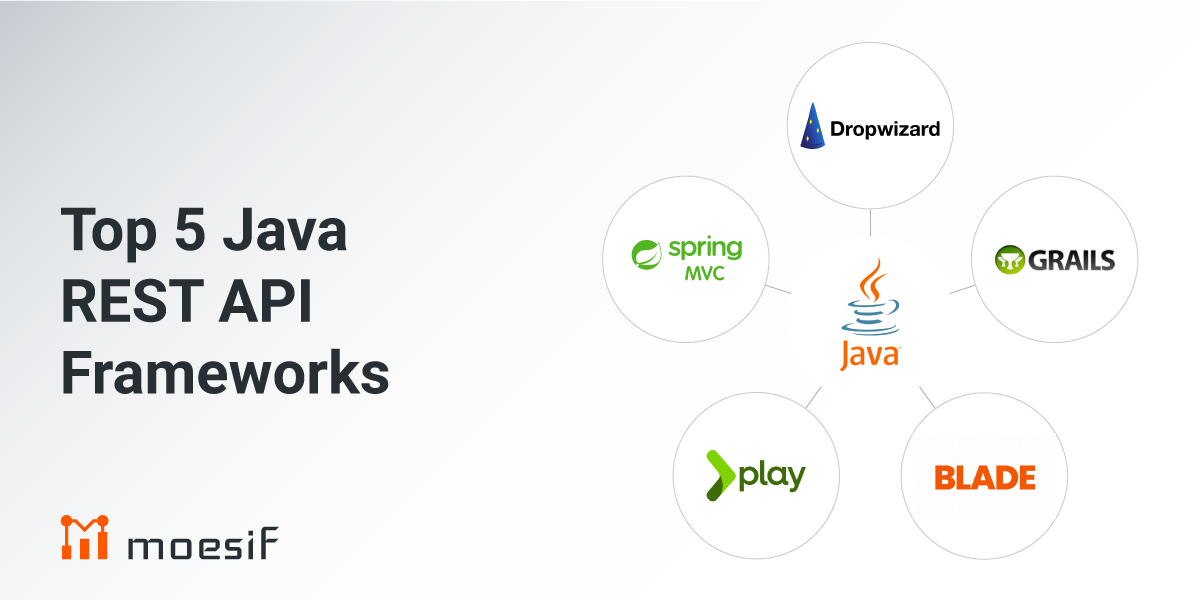
In conclusion, there are many Java-based frameworks available for building RESTful APIs. Each one has its own strengths and weaknesses, and the best choice depends on your specific needs and goals.
rest api in java spring boot
Here's a detailed explanation of how to create a RESTful API using Java and Spring Boot:
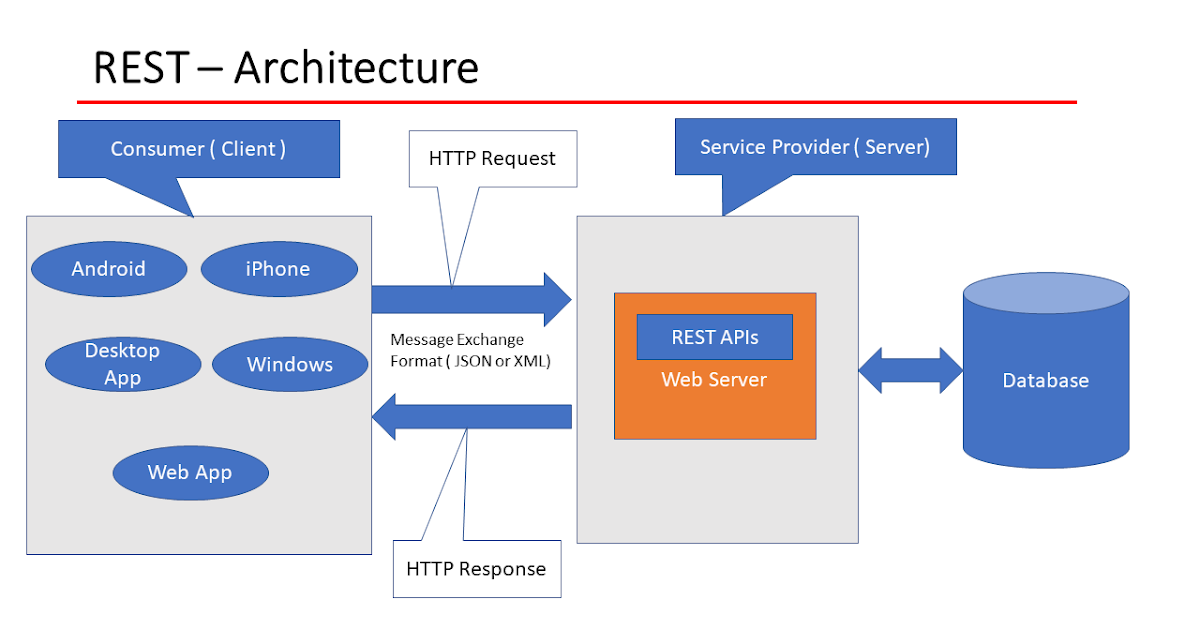
What is REST?
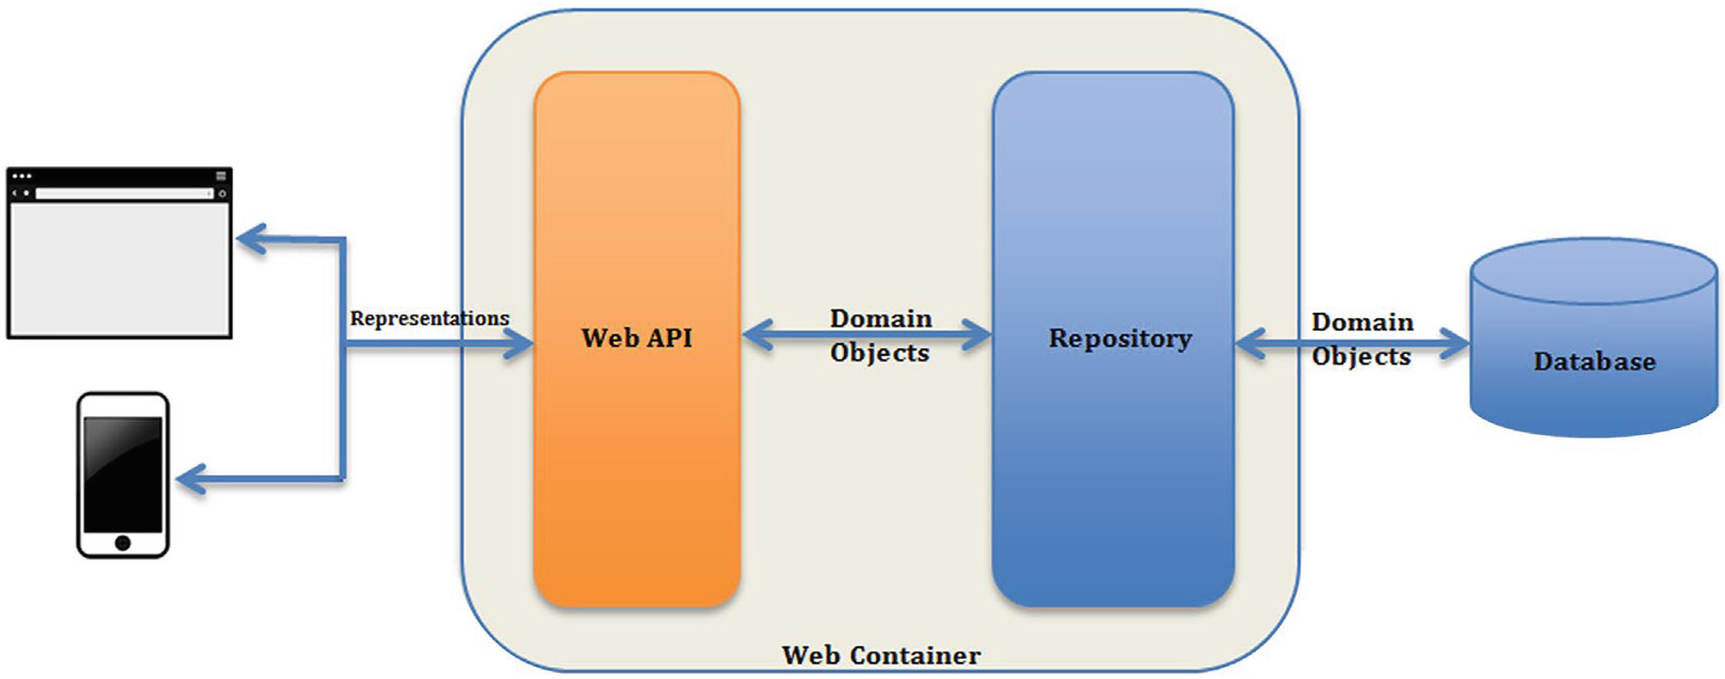
REST (Representational State of Resource) is an architectural style for designing networked applications. It's based on the idea that each resource (like a user or a product) should be addressable, recognizable by its identifier, and manipulated using a fixed set of operations. In other words, resources are identified with URIs, which can then be accessed using standard HTTP methods like GET, POST, PUT, and DELETE.
What is Spring Boot?
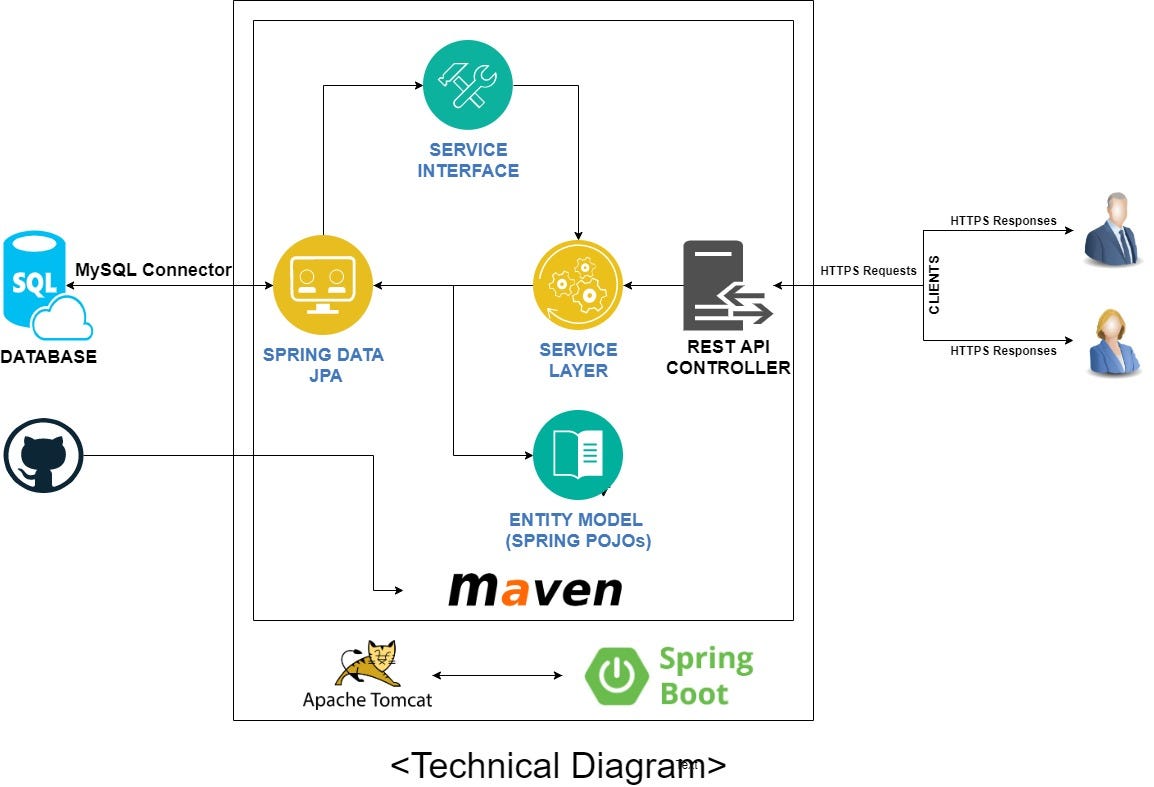
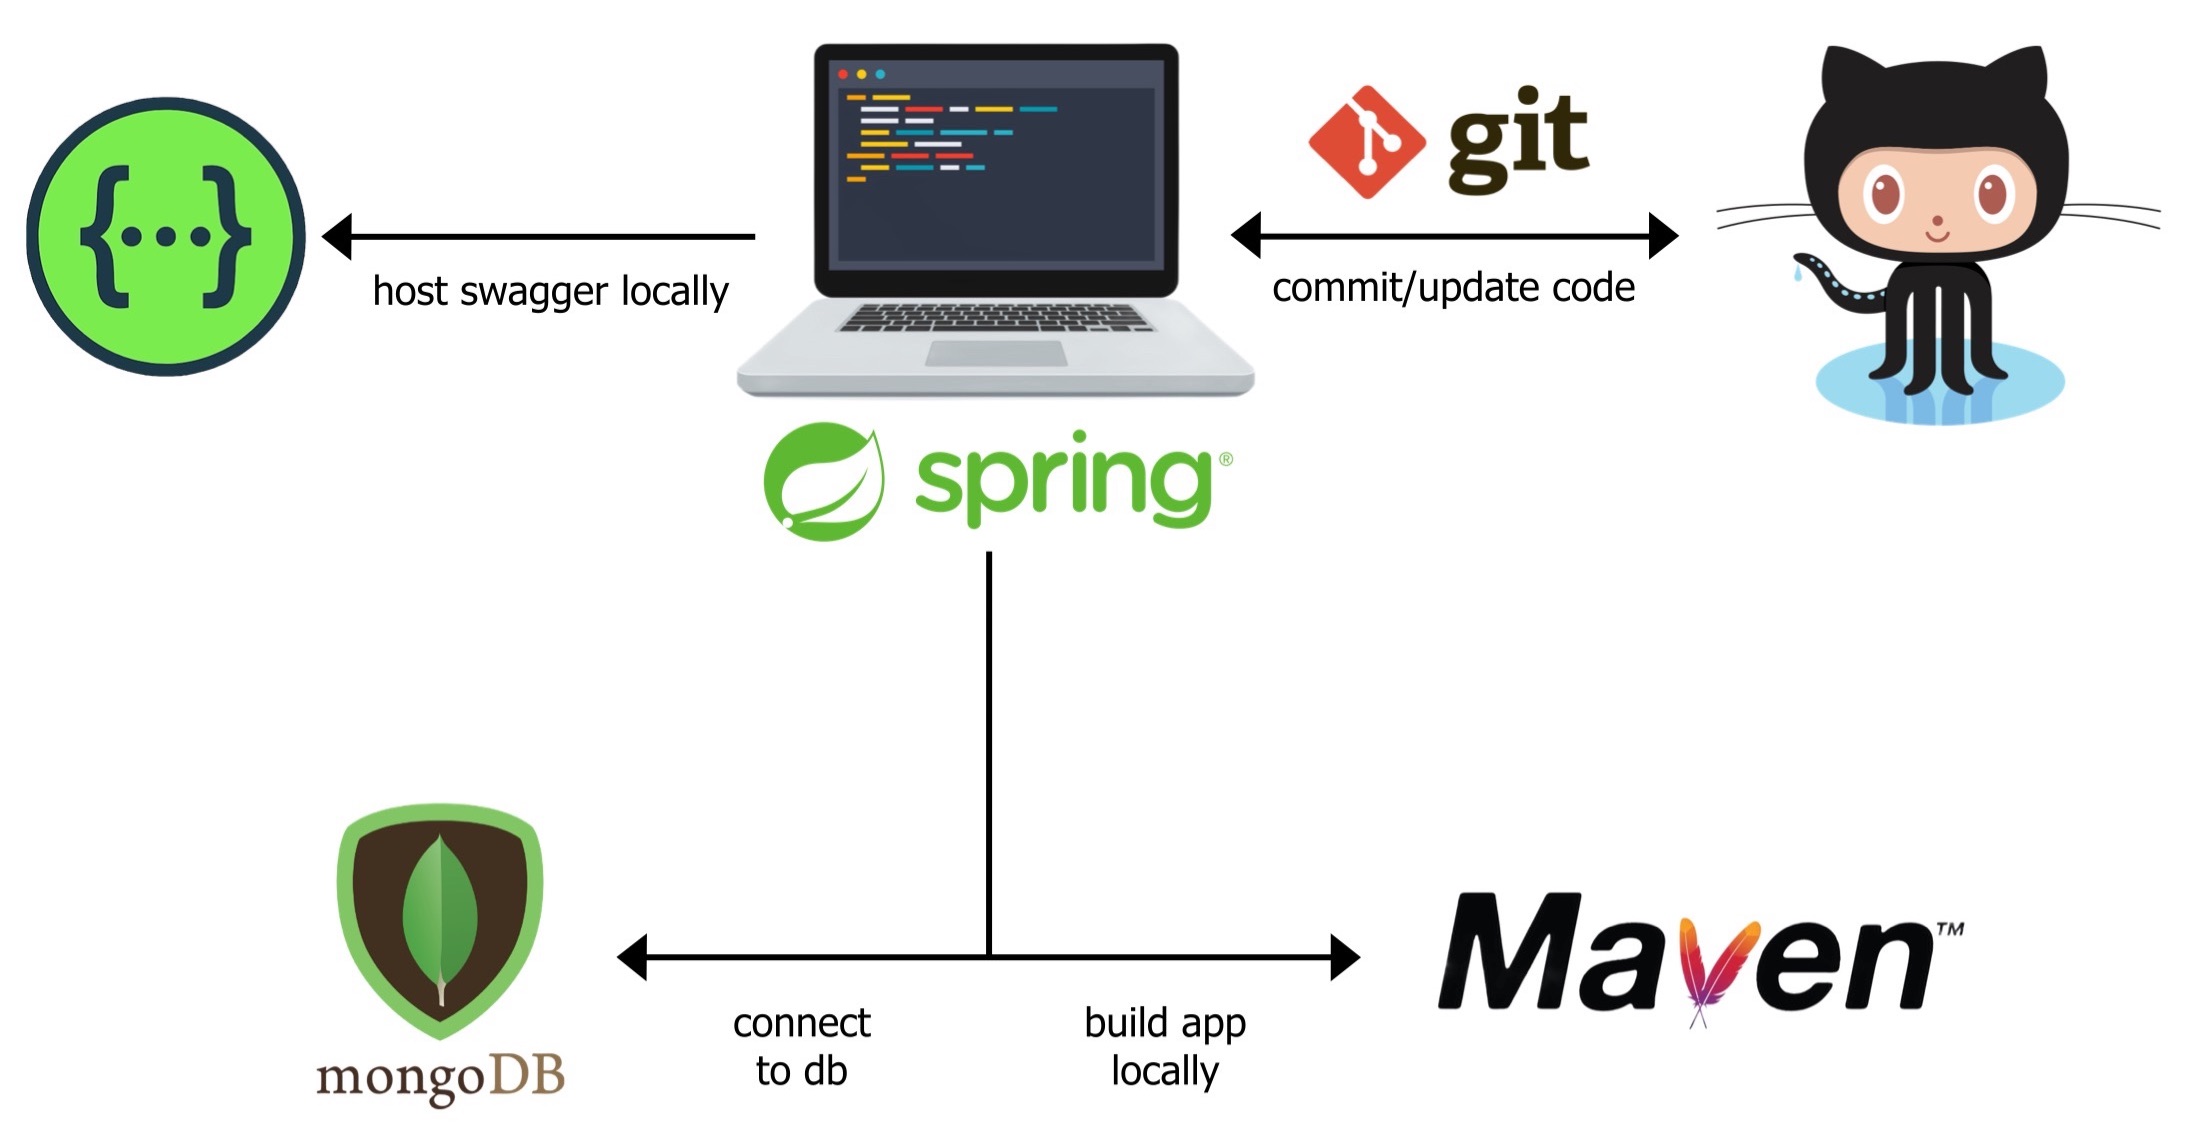
Spring Boot is an open-source framework that simplifies the process of creating web applications in Java. It takes care of many configuration tasks and auto-configuration for you, so you can focus on writing code. Spring Boot also includes support for RESTful APIs out of the box.
Step 1: Create a New Spring Boot Project
To get started with building a REST API using Spring Boot, first create a new project in your IDE (Integrated Development Environment) or use an online tool like Spring Initializr. For this example, let's assume we're creating a simple CRUD (Create, Read, Update, Delete) application for managing users.
Step 2: Add Dependencies and Configuration
In the pom.xml file (if you're using Maven), add the following dependencies:
org.springframework.boot
spring-boot-starter-web
org.springframework.boot
spring-boot-starter-data-jpa
In the application.properties file, add the following configuration:
spring.datasource.url=jdbc:postgresql://localhost:5432/mydbspring.datasource.username=myuser
spring.datasource.password=mypassword
spring.jpa.hibernate.ddl-auto=update
Step 3: Create a REST Controller
Create a new Java class called UserController.java with the following code:
@RestController@RequestMapping("/users")
public class UserController {
@Autowired
private UserService userService;
@GetMapping
public List getAllUsers() {
return userService.getAllUsers();
}
@GetMapping("/{id}")
public User getUserById(@PathVariable Long id) {
return userService.getUserById(id);
}
@PostMapping
public User createUser(@RequestBody User user) {
return userService.createUser(user);
}
@PutMapping("/{id}")
public User updateUser(@PathVariable Long id, @RequestBody User user) {
return userService.updateUser(id, user);
}
@DeleteMapping("/{id}")
public void deleteUser(@PathVariable Long id) {
userService.deleteUser(id);
}
}
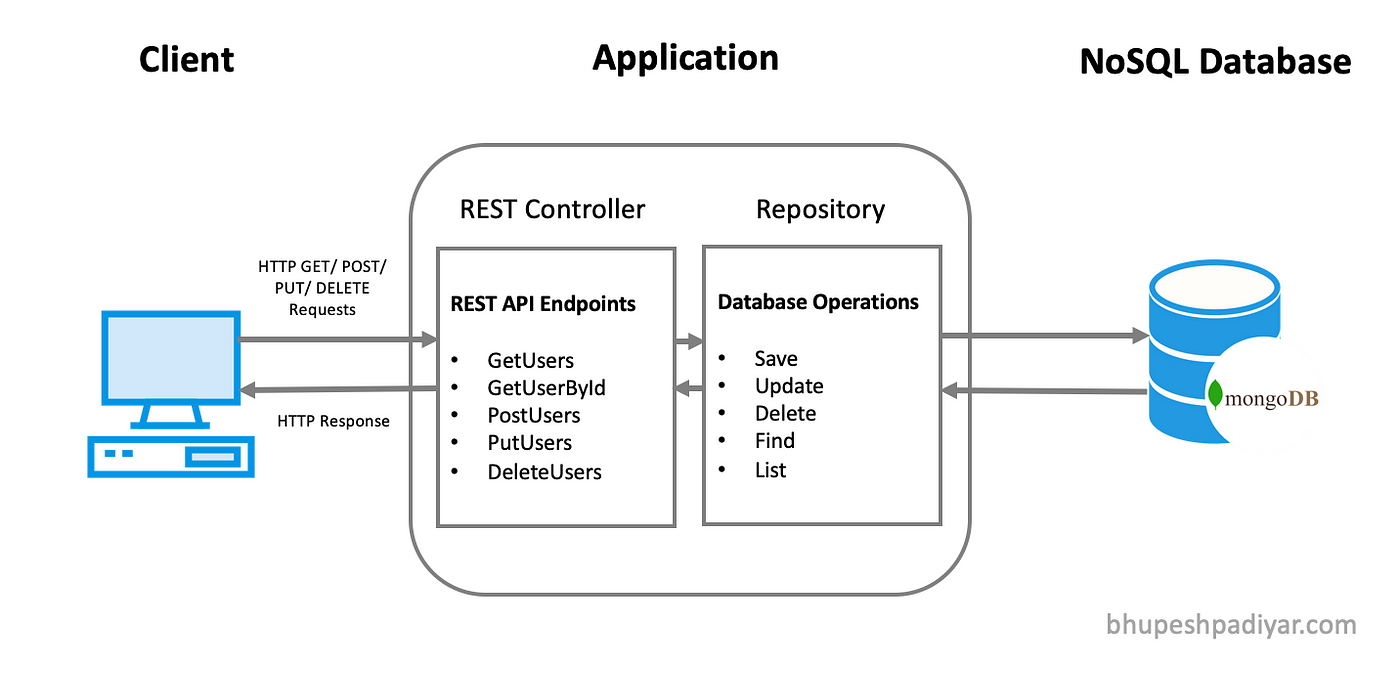
This controller class handles GET, POST, PUT, and DELETE requests for the /users endpoint. The UserService class is not shown here, but it would contain the business logic for interacting with the database.
Step 4: Create a Service Class
Create a new Java class called UserService.java with the following code:
@Servicepublic class UserService {
@Autowired
private UserRepository userRepository;
public List getAllUsers() {
return userRepository.findAll();
}
public User getUserById(Long id) {
return userRepository.findById(id).orElse(null);
}
public User createUser(User user) {
// Business logic here...
return userRepository.save(user);
}
public User updateUser(Long id, User user) {
// Business logic here...
return userRepository.save(user);
}
public void deleteUser(Long id) {
// Business logic here...
userRepository.deleteById(id);
}
}
This service class contains the business logic for interacting with the database using JPA (Java Persistence API).
Step 5: Create a Repository Class
Create a new Java interface called UserRepository.java with the following code:
public interface UserRepository extends JpaRepository {List findAll();
User findById(Long id);
User save(User user);
}
This repository class defines the methods for interacting with the database using JPA.
Step 6: Run the Application
Run your Spring Boot application, and you should be able to access the REST API endpoints using a tool like Postman or cURL. For example, to retrieve all users, send a GET request to http://localhost:8080/users. To create a new user, send a POST request with JSON data to http://localhost:8080/users.
This is a basic example of how to build a RESTful API using Java and Spring Boot. You can add more features, error handling, and security as needed.