How does JDBC allow to access databases through Java?
How does JDBC allow to access databases through Java?
JDBC (Java Database Connectivity) is a set of APIs that enables Java programs to interact with various relational databases, such as MySQL, Oracle, and PostgreSQL, among others. It allows developers to perform database-related operations like creating, reading, updating, and deleting data from a database using Java code.
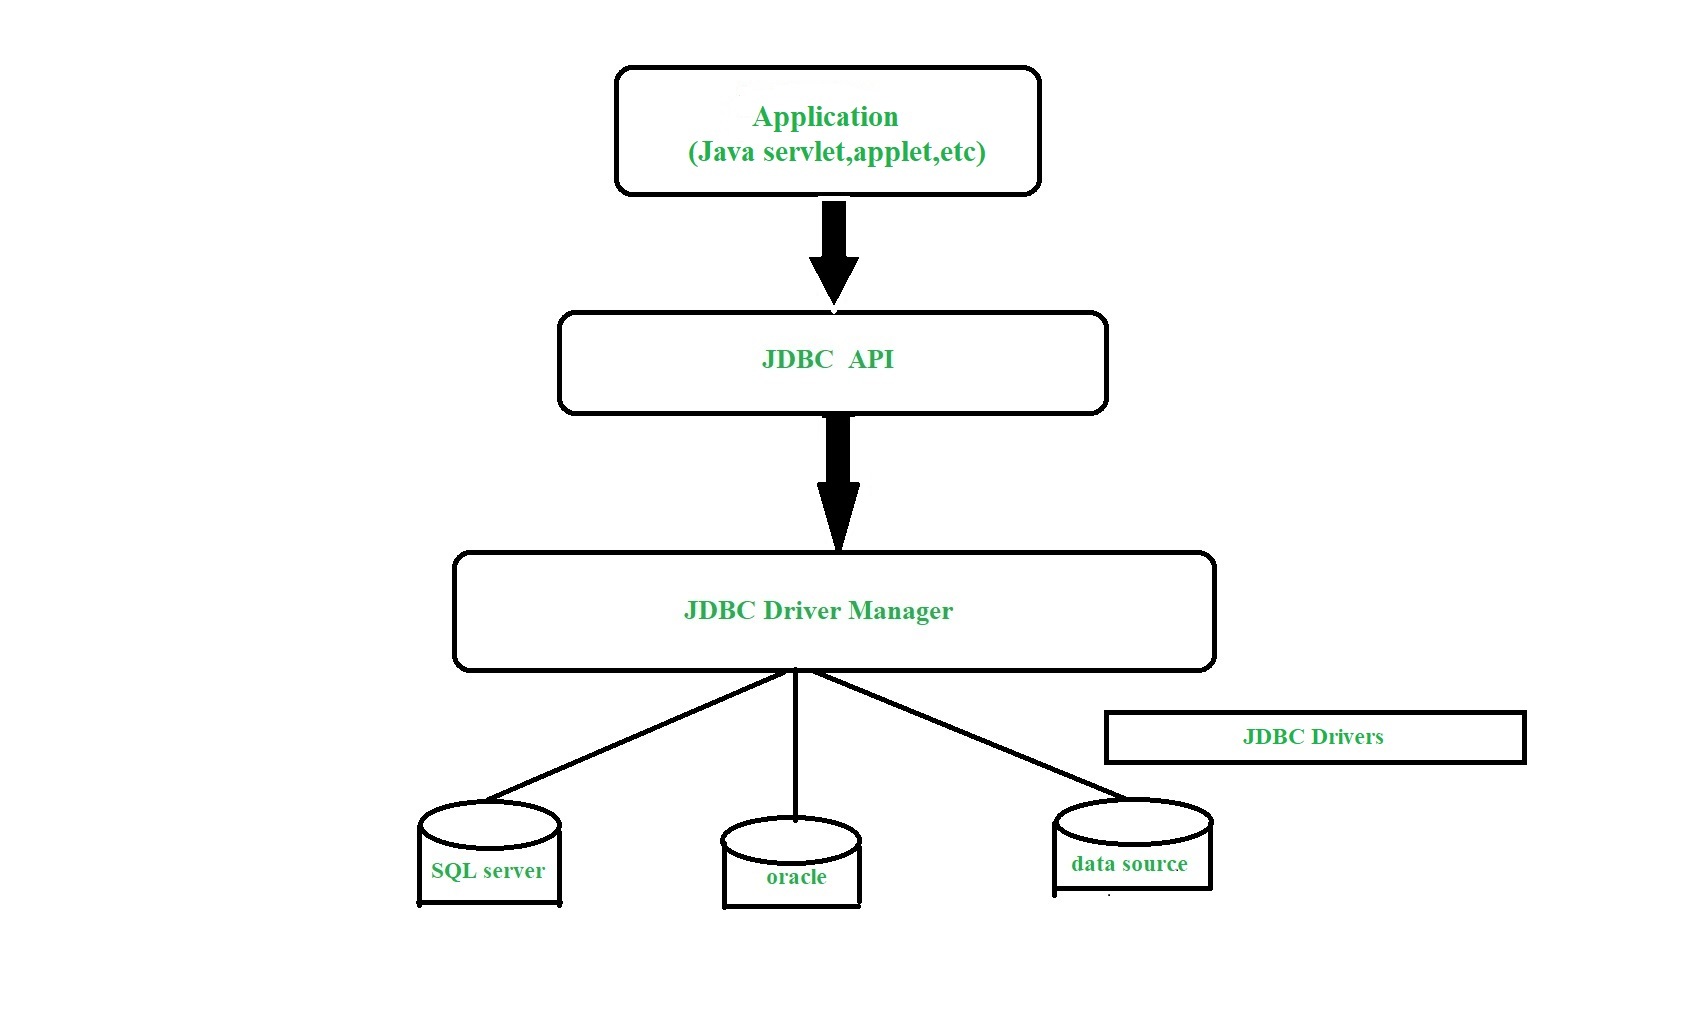
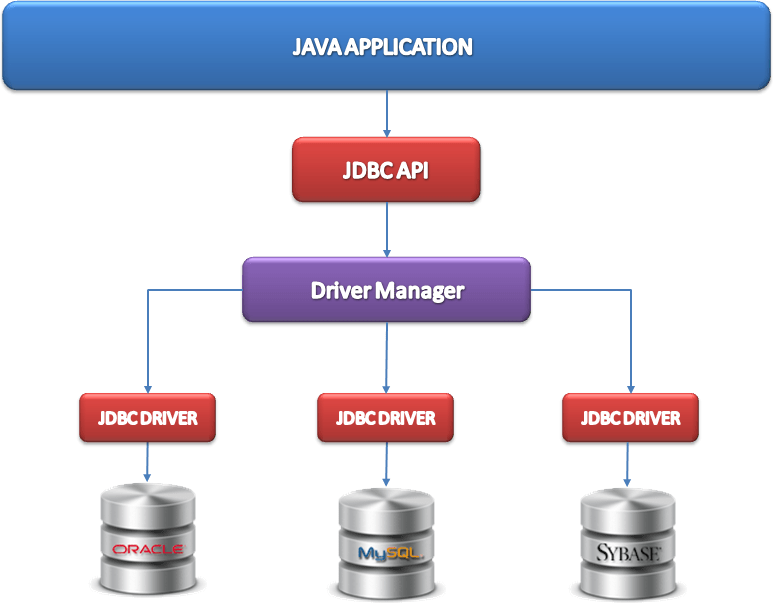
Here's how JDBC facilitates access to databases through Java:
Driver Manager: The first step is to load the JDBC driver manager, which loads the specific driver for the target database (e.g., MySQL, Oracle). This is done by callingClass.forName("com.mysql.cj.jdbc.Driver") or similar code. Create a Connection: Once the driver manager is loaded, you need to create a connection to the database using the getConnection() method, which takes the URL of the database (e.g., "jdbc:mysql://localhost/mydb"), username, and password as parameters: Connection conn = DriverManager.getConnection("jdbc:mysql://localhost/mydb", "username", "password");. Execute SQL Queries: With a connection established, you can execute SQL queries using Statement or PreparedStatement objects. These objects are used to send SQL statements to the database for execution. Retrieve Data: To retrieve data from the database, you use ResultSet objects, which contain the results of a query. You can then iterate over the result set and extract the desired data using methods like getInt(), getString(), or getBlob(). Update or Delete Data: When needed, you can update or delete data in the database using Statement.executeUpdate() or PreparedStatement.executeUpdate(). These methods execute an SQL UPDATE or DELETE statement on the database. Close the Connection: Finally, when you're finished working with the database, it's essential to close the connection using Connection.close() to free up system resources and prevent potential issues.
Some benefits of using JDBC for accessing databases in Java include:
Portability: JDBC allows your Java application to work with various relational databases without worrying about the underlying database-specific syntax. Simplified Database Operations: With JDBC, you can perform common database operations like creating, reading, updating, and deleting data from a database using simple and intuitive API methods. Scalability: As your Java application grows in complexity and user base, JDBC helps ensure that your database interactions remain efficient and manageable.Overall, JDBC provides a standardized way for Java programs to interact with relational databases, simplifying the process of accessing and manipulating data.
How to install JDBC driver for Java?
Installing a JDBC (Java Database Connectivity) driver is necessary when you want your Java application to interact with a database, such as MySQL or Oracle. The process of installing a JDBC driver varies depending on the type of database and the operating system you are using.
Method 1: Manual Installation

For manual installation, follow these steps:
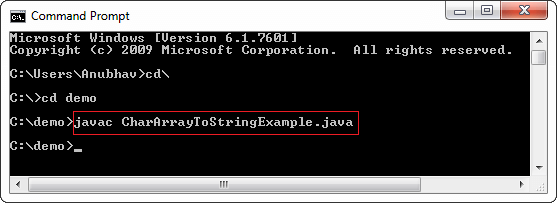
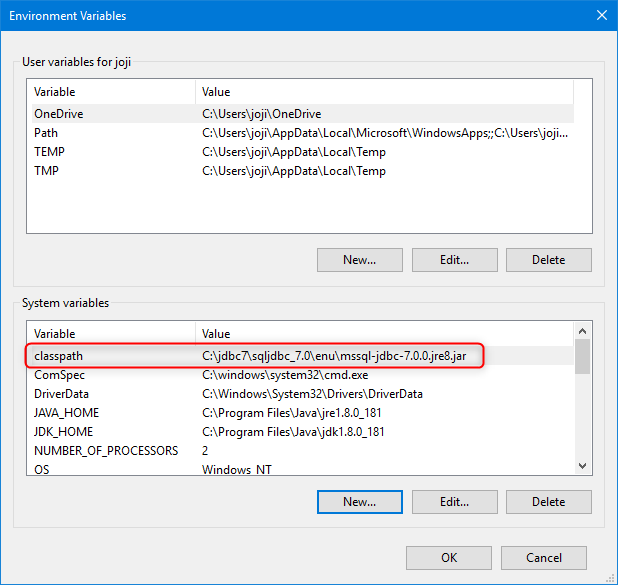
Download the JDBC Driver: Go to the official website of the database management system (DBMS) you want to connect to. For example, if you want to connect to a MySQL database, go to MySQL.com. Download the appropriate JDBC driver based on your operating system. Unzip the Driver: Extract the downloaded zip file to a location of your choice. The default folder for many systems isC:Program FilesMySQLmysql-connector-java-XX.X.X.jar for Windows or /usr/share/mysql/connector-java.jar for Linux. Add the Driver to Your CLASSPATH: Modify your system's environment variable CLASSPATH to include the path of the unzipped driver file. On a Unix-based system, you would add the following command in your terminal: export CLASSPATH=$CLASSPATH:/usr/share/mysql/connector-java.jar (assuming the driver is located in /usr/share/mysql/). For Windows systems, right-click on "Computer" or "This PC," select Properties, then Advanced System Settings, and finally, click on Environment Variables. Add a new variable named CLASSPATH with the path of your driver file. Verify Your Installation: Compile a simple Java program using the JDBC driver to verify that it's installed correctly:
import java.sql.*;public class TestJDBC {
public static void main(String[] args) {
try {
Connection conn = DriverManager.getConnection("jdbc:mysql://localhost:3306/mydb", "username", "password");
Statement stmt = conn.createStatement();
ResultSet rset = stmt.executeQuery("SELECT * FROM mytable");
while(rset.next()) {
System.out.println(rset.getString(1));
}
} catch (SQLException e) {
e.printStackTrace();
}
}
}
Method 2: Maven or Gradle
If you're using a build tool like Maven or Gradle, you can include the JDBC driver in your project's dependencies.
For Maven, add the following dependency to your pom.xml file:
mysql
mysql-connector-java
XX.X.X
For Gradle, add the following dependency to your build.gradle file:
dependencies {implementation 'mysql:mysql-connector-java:XX.X.X'
}
Method 3: Using a Build Tool (for Eclipse)
If you're using an Integrated Development Environment (IDE) like Eclipse, you can install the JDBC driver as follows:
Download the Driver: Go to the MySQL website and download the necessary JDBC driver for your system. Create a New Library Folder: In your Eclipse project, right-click on theReferenced Libraries folder, then select New > Folder. Name this new folder something like mysql-connector-java. Add the Driver: Copy the downloaded JDBC driver file and paste it into your newly created mysql-connector-java folder. Link the Driver to Your Project: Right-click on your Eclipse project, then select Properties > Java Build Path > Libraries. Click Add External JARs..., navigate to your mysql-connector-java folder, and select the JDBC driver file (e.g., mysql-connector-java.jar). Click OK.
After installing a JDBC driver, you're ready to create Java programs that interact with your chosen database.